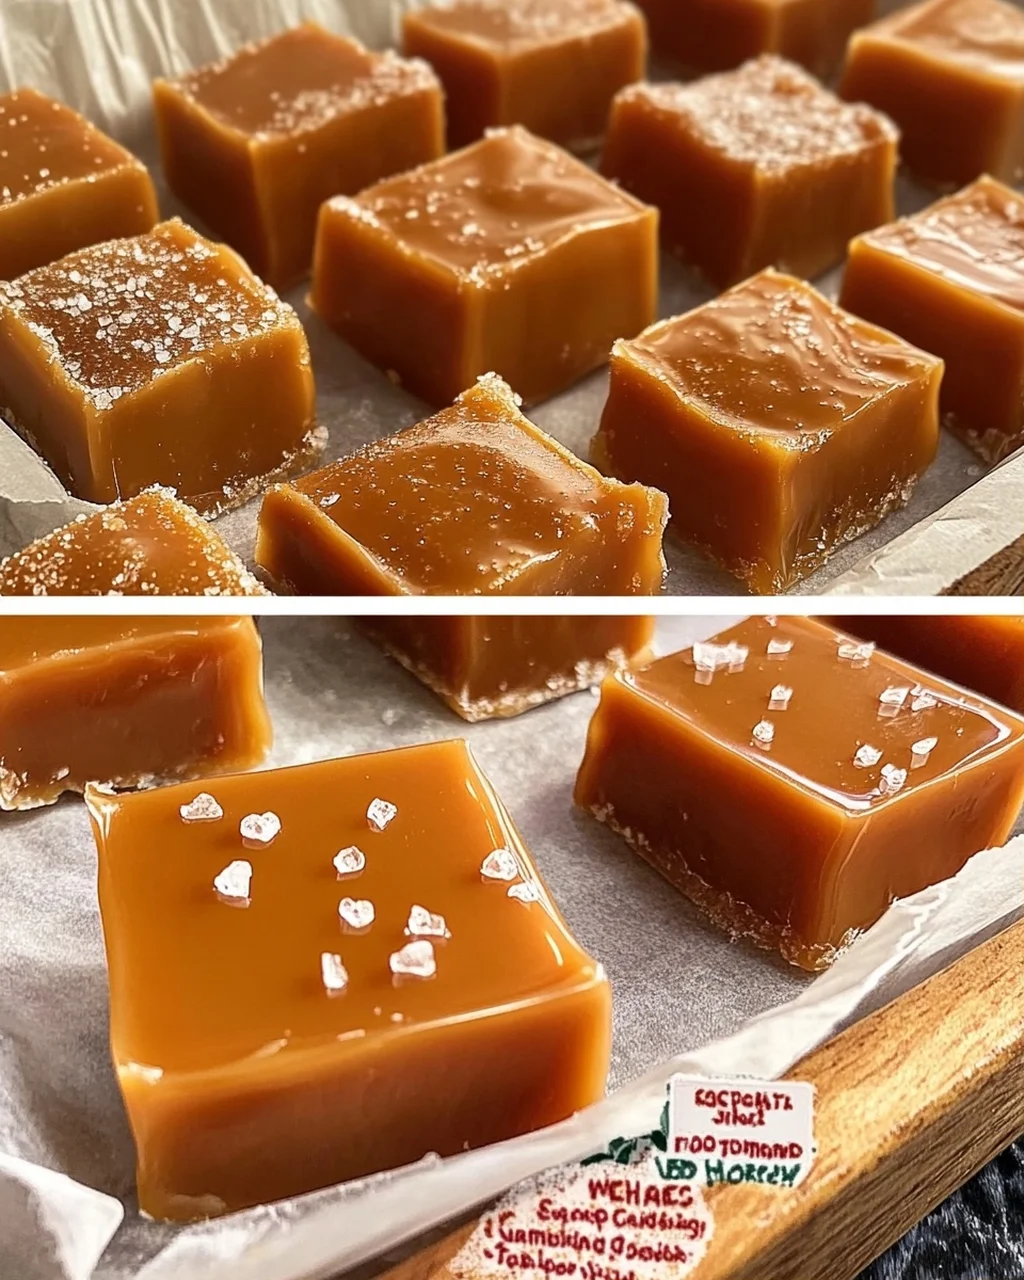
If you’re looking for a sweet treat that captures the nostalgia of yesteryear, this Homemade Caramels Vintage Recipe is just the thing! There’s something so heartwarming about making caramels from scratch—it’s like wrapping a little bit of love in every chewy piece. Whether it’s for busy weeknights or family gatherings, these caramels are sure to bring smiles and joy to everyone who tries them. Plus, with a variety of flavors—from classic buttery caramels to rich salted confections—there’s something for every palate.
Why You’ll Love This Recipe
- Easy to Make: You don’t need to be a professional chef! These caramels come together with simple steps that anyone can follow.
- Family-Friendly Fun: Making caramels can be a delightful activity to enjoy with kids or friends. Everyone loves getting involved!
- Perfect for Gifting: Wrap them up in pretty paper, and you have the perfect homemade gift for birthdays, holidays, or just because.
- Rich and Flavorful: The buttery textures and delightful flavors will satisfy your sweet tooth like nothing else.
- Make Ahead Convenience: Prepare these caramels ahead of time and store them for later—the perfect solution for when cravings strike!

Ingredients You’ll Need
For this recipe, we’ll be using simple, wholesome ingredients that you likely already have in your pantry. Don’t worry; everything comes together beautifully!
Classic Homemade Caramels
- 1 cup (240ml) heavy cream
- 1 cup (200g) granulated sugar
- 1/2 cup (115g) unsalted butter, cut into cubes
- 1/4 cup (60ml) light corn syrup
- 1 tsp vanilla extract
- 1/4 tsp sea salt
Vintage Butter Caramels
- 1 cup (240ml) whole milk
- 1 1/2 cups (300g) granulated sugar
- 1 cup (225g) unsalted butter
- 1/4 cup (60ml) light corn syrup
- 1/2 tsp baking soda
- 1 tbsp vanilla extract
Salted Caramel Confections
- 1 cup (240ml) heavy cream
- 1 cup (200g) granulated sugar
- 1/2 cup (115g) unsalted butter
- 1/4 cup (60ml) water
- 1/2 tsp Maldon sea salt flakes
- 1/4 tsp fine sea salt
- 1 tsp vanilla bean paste
Caramelized Sugar Candies
- 2 cups (400g) granulated sugar
- 1/2 cup (120ml) water
- 1 tbsp light corn syrup
- 1/2 tsp citric acid powder
- (Optional) Food coloring
- (Optional) Flavoring oil
Old-Fashioned Caramel Drops
- 1 cup (240ml) heavy cream
- 1 cup (200g) brown sugar
- 1/2 cup (115g) unsalted butter
- 1/4 cup (60ml) light corn syrup
- 1/2 tsp vanilla extract
- 1/4 tsp salt
- 1 cup powdered sugar
Handmade Caramel Nougat
- 2 large egg whites (room temperature)
- 1/4 cup (60ml) water
- 1 cup (200g) granulated sugar
- 1/2 cup (120ml) light corn syrup
- 1/2 cup (115g) unsalted butter
- 1/2 cup (120ml) heavy cream
- 1 tsp vanilla extract
- 1/4 tsp salt
Variations
This recipe is wonderfully flexible! Here are a few ideas to help you customize your homemade caramels:
- Add Nuts: Toss in some chopped nuts like pecans or almonds for an extra crunch.
- Infuse Flavors: Experiment by adding flavors such as espresso powder or citrus zest for unique twists.
- Go Chocolatey: Drizzle melted chocolate over the set caramels for a decadent treat.
- Make it Spicy: A pinch of cayenne pepper or cinnamon can add an unexpected kick to your caramel.
How to Make Homemade Caramels Vintage Recipe
Step 1: Prepare the Sauce
Start by lining an 8×8 inch square baking pan with parchment paper and lightly greasing it. This ensures your caramels won’t stick once they’re set and makes it easier to lift them out after cooling.
Step 2: Combine Ingredients
In a saucepan over medium heat, combine the heavy cream, granulated sugar, corn syrup, and sea salt. Whisk until everything is dissolved and simmering. This step is crucial as it blends all the flavors together before cooking.
Step 3: Cook the Mixture
Attach a candy thermometer and cook without stirring until it reaches 245°F (118°C). This usually takes about 10–15 minutes. Patience is key here; stirring can cause crystallization.
Step 4: Add Butter and Vanilla
Once at temperature, carefully remove from heat and add the cubed butter in batches while whisking until melted. Stir in vanilla extract off the heat. This not only adds flavor but also gives that signature creamy texture.
Step 5: Cool Down Time
Pour the mixture into your prepared pan and tap it gently to release any air bubbles. Let it sit at room temperature for at least four hours or refrigerate for two hours until firm. This waiting period allows the flavors to develop fully.
Step 6: Cut Your Treats
Once set, lift out using the parchment overhang and cut into one-inch squares with a hot knife. Wrapping each piece individually in wax paper keeps them fresh and easy to share!
Enjoy crafting these delicious homemade caramels! Each bite will take you back in time as you savor those rich flavors.
Pro Tips for Making Homemade Caramels Vintage Recipe
Creating the perfect batch of homemade caramels can be a delightful challenge, and these simple tips will help you achieve that buttery, chewy texture every time!
Use a Candy Thermometer: This ensures accurate temperature readings, which is crucial for achieving the right consistency in your caramels. Without it, you risk undercooking or burning your mixture.
Stir Gently: When mixing your ingredients, be gentle to prevent crystallization. Vigorous stirring can introduce air bubbles and ruin the smooth texture of the caramel.
Prepare Your Workspace: Before you start cooking, have all your tools and ingredients ready. This helps streamline the process and prevents any last-minute scrambles that could lead to mistakes.
Cool Completely Before Cutting: Allow your caramels to cool fully at room temperature before slicing them into squares or shapes. This step is essential to ensure they hold their form and do not stick together.
Store Properly: Wrap each caramel in wax paper or parchment paper to keep them fresh and prevent them from sticking together. Store in an airtight container at room temperature for optimal texture.
How to Serve Homemade Caramels Vintage Recipe
These homemade caramels are not just delicious but also versatile when it comes to serving! Here are some creative ideas to showcase your sweet creations.
Garnishes
Sprinkle of Sea Salt: A light sprinkle on top enhances the flavor profile by adding a touch of savory contrast to the sweetness.
Chopped Nuts: Add chopped almonds or pecans on top for an added crunch and nutty flavor that complements the caramel beautifully.
Side Dishes
Fresh Fruit Salad: A refreshing accompaniment that balances the sweetness of the caramels with vibrant flavors from seasonal fruits like apples and berries.
Coffee or Tea: The rich notes of coffee or tea make an excellent pairing with caramels, enhancing their flavor while providing a cozy beverage option.
Cheese Board: A selection of mild cheeses can contrast nicely with the sweetness of the caramels, creating a delightful savory-sweet experience.
With these serving suggestions, your homemade caramels will not only taste fantastic but also look inviting on any platter! Enjoy sharing these treats with family and friends.
Make Ahead and Storage
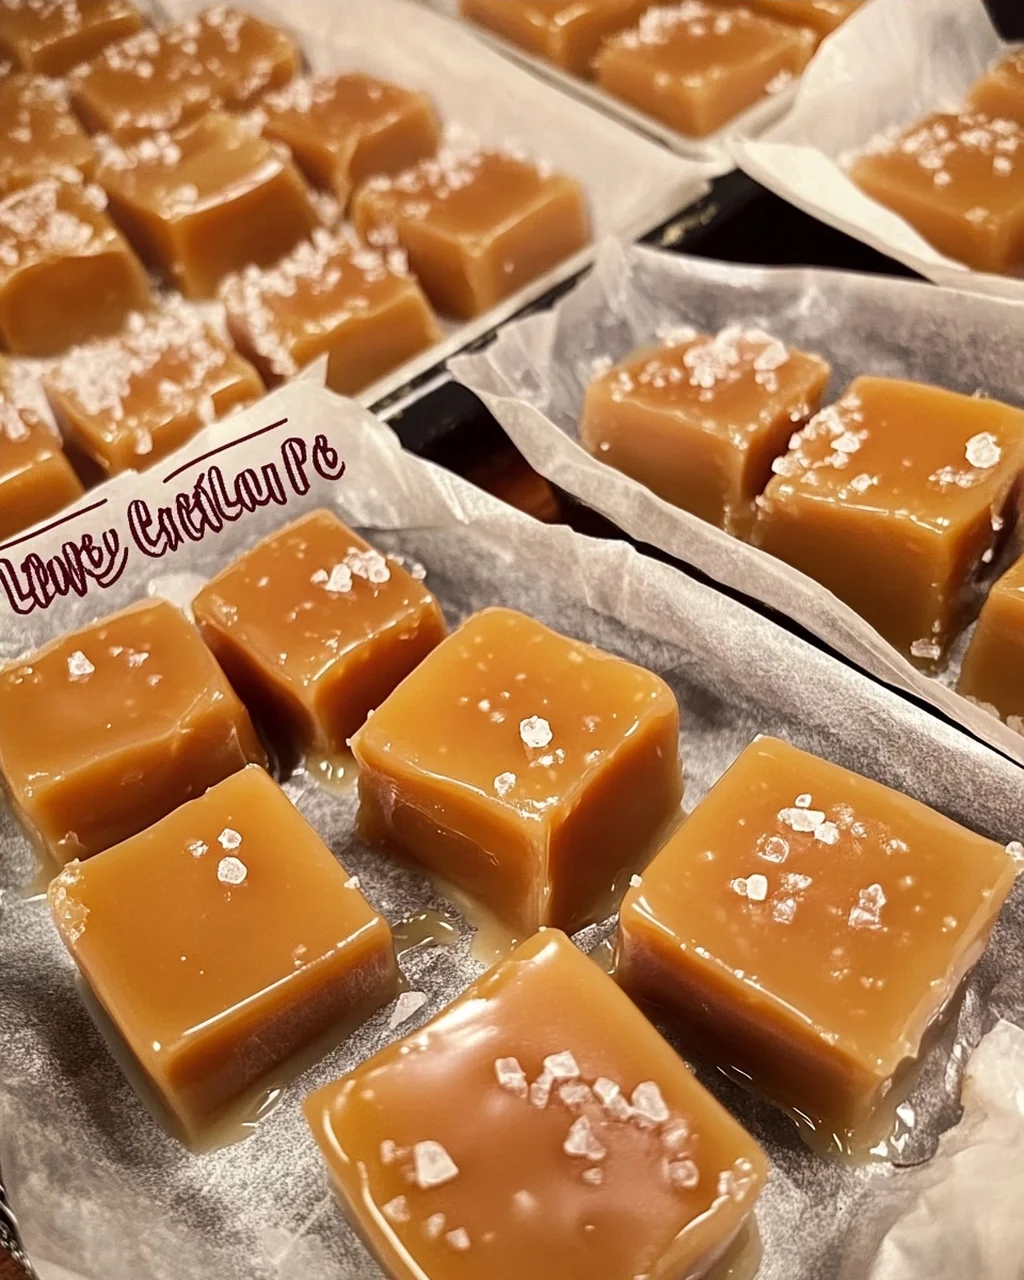
One of the best things about these homemade caramels is that they are perfect for meal prep! You can make a batch ahead of time and have delicious treats on hand for any occasion. Here’s how to store them properly to keep their flavor and texture intact.
Storing Leftovers
- Store caramels in an airtight container at room temperature for up to two weeks.
- If you live in a humid climate, consider refrigerating them to maintain their firmness.
- Always separate layers with parchment paper to prevent sticking.
Freezing
- Wrap individual caramels in wax paper or plastic wrap before placing them in a freezer-safe container.
- They can be frozen for up to three months without losing flavor or texture.
- To thaw, simply let them sit at room temperature for about 30 minutes before enjoying.
Reheating
- If your caramels become too hard, place them in a microwave-safe dish with a splash of milk and heat in short intervals (10-15 seconds) until softened.
- Avoid overheating as this can change their consistency and flavor.
FAQs
Here are some common questions about the Homemade Caramels Vintage Recipe that might help you along your caramel-making journey.
Can I use a different type of sugar for the Homemade Caramels Vintage Recipe?
Yes! While granulated sugar is standard, you can experiment with brown sugar or coconut sugar for a slightly different flavor profile. Just be aware that it may alter the caramel’s color and texture.
What makes the Homemade Caramels Vintage Recipe special?
This recipe is special because it highlights traditional techniques and flavors, allowing you to create rich, nostalgic treats that remind you of childhood. Each variation offers unique taste experiences while maintaining that classic caramel goodness.
How long do homemade caramels last?
Homemade caramels will last about two weeks at room temperature when stored properly. For longer storage, consider freezing them, where they can stay fresh for about three months.
Can I add flavors to the Homemade Caramels Vintage Recipe?
Absolutely! Feel free to incorporate extracts like almond or hazelnut, or add spices such as cinnamon or nutmeg to customize your caramels further. Just adjust the quantities according to your taste preferences.
Final Thoughts
Making homemade caramels is not just about satisfying your sweet tooth; it’s an experience filled with nostalgia and warmth. Each bite takes you back to simpler times, making it a delightful treat for both yourself and loved ones. I hope you enjoy trying out these vintage-inspired recipes as much as I do! So gather your ingredients, roll up your sleeves, and get ready to create something truly special. Happy cooking!
Homemade Caramels
- Total Time: 40 minutes
- Yield: 6 servings 1x
Description
Create rich, chewy homemade caramels with these six vintage-inspired recipes featuring buttery textures and salted or nutty flavor profiles.
Ingredients
- 1 cup heavy cream
- 1 cup granulated sugar
- 1/2 cup unsalted butter (cut into cubes)
- 1/4 cup light corn syrup
- 1 tsp vanilla extract
- 1/4 tsp sea salt
- 1 cup whole milk
- 1 1/2 cups granulated sugar
- 1 cup unsalted butter
- 1/4 cup light corn syrup
- 1/2 tsp baking soda
- 1 tbsp vanilla extract
- 1 cup heavy cream
- 1 cup granulated sugar
- 1/2 cup unsalted butter
- 1/4 cup water
- 1/2 tsp Maldon sea salt flakes
- 1/4 tsp fine sea salt
- 1 tsp vanilla bean paste
- 2 cups granulated sugar
- 1/2 cup water
- 1 tbsp light corn syrup
- 1/2 tsp citric acid powder
- Food coloring
- Flavoring oil
- 1 cup heavy cream
- 1 cup brown sugar
- 1/2 cup unsalted butter
- 1/4 cup light corn syrup
- 1/2 tsp vanilla extract
- 1/4 tsp salt
- 1 cup powdered sugar
- 2 large egg whites (room temperature)
- 1/4 cup water
- 1 cup granulated sugar
- 1/2 cup light corn syrup
- 1/2 cup unsalted butter
- 1/2 cup heavy cream
- 1 tsp vanilla extract
- 1/4 tsp salt
Instructions
- Line an 8×8 inch square baking pan with parchment paper and grease lightly; combine heavy cream, granulated sugar, corn syrup, and salt in a saucepan over medium heat, whisking until dissolved and simmering; attach a candy thermometer and cook without stirring to 245°F (118°C), taking 10–15 minutes; remove from heat and carefully add cubed butter in batches, whisking until melted; stir in vanilla extract off-heat; pour into the prepared pan, tap to release air bubbles, and let sit at room temperature for at least 4 hours or refrigerate for 2 hours until firm; lift out using parchment overhang and cut into 1-inch squares with a hot knife, wrapping individually in wax paper.
- Combine whole milk, granulated sugar, corn syrup, and butter in a heavy-bottomed saucepan over medium-low heat, stirring frequently until melted and dissolved; bring to a boil and stop stirring, inserting a candy thermometer to boil gently until reaching 248°F (120°C), which takes 12–15 minutes; remove from heat and immediately sprinkle in baking soda, whisking vigorously for 30 seconds until foamy and opaque; stir in vanilla extract quickly; pour into a greased 9×9 inch pan without spreading to preserve bubbles and allow to cool completely at room temperature for 6 hours; lift from the pan and cut into small bite-sized pieces.
- Combine granulated sugar, water, and fine sea salt in a saucepan over medium heat, stirring until dissolved then stopping to swirl occasionally until the syrup turns deep amber at around 350°F (177°C); slowly pour heavy cream into the hot caramel in a thin stream while whisking constantly to handle violent bubbling; remove from heat and stir in butter until melted; stir in vanilla bean paste; pour into a lined 8×8 inch pan and sprinkle Maldon sea salt flakes evenly over the surface while warm; refrigerate for 3 hours until set, then cut into rectangles.
- Mix granulated sugar, water, corn syrup, and citric acid in a heavy saucepan, stirring gently just until moistened; bring to a boil over medium-high heat without stirring, clipping a candy thermometer to the side and cooking until reaching 300°F (149°C); remove from heat, swirl in food coloring if using, and briefly mix in flavoring oil; pour the hot syrup onto a silicone mat or well-greased marble slab; once cooled and hardened after about 15 minutes, break into irregular pieces.
- Combine heavy cream, brown sugar, unsalted butter, light corn syrup, vanilla extract, and salt in a saucepan over medium heat; stir until melted and smooth; pour into a greased pan and allow to cool completely before cutting into pieces.
- In a saucepan, combine water and granulated sugar, cooking until it reaches 240°F (115°C); in a separate bowl, whip egg whites to soft peaks; slowly pour the sugar syrup into the egg whites while continuing to whip; add light corn syrup, unsalted butter, heavy cream, and vanilla extract, mixing until well combined; pour into a greased pan and let set before cutting.
- Prep Time: 20 minutes
- Cook Time: 20 minutes
Nutrition
- Serving Size: 1
- Calories: 150
- Sugar: 15g
- Sodium: 50mg
- Fat: 7g
- Saturated Fat: 4g
- Unsaturated Fat: 3g
- Trans Fat: 0g
- Carbohydrates: 20g
- Fiber: 0g
- Protein: 1g
- Cholesterol: 15mg
Keywords: These recipes yield a variety of caramels with different textures and flavors.