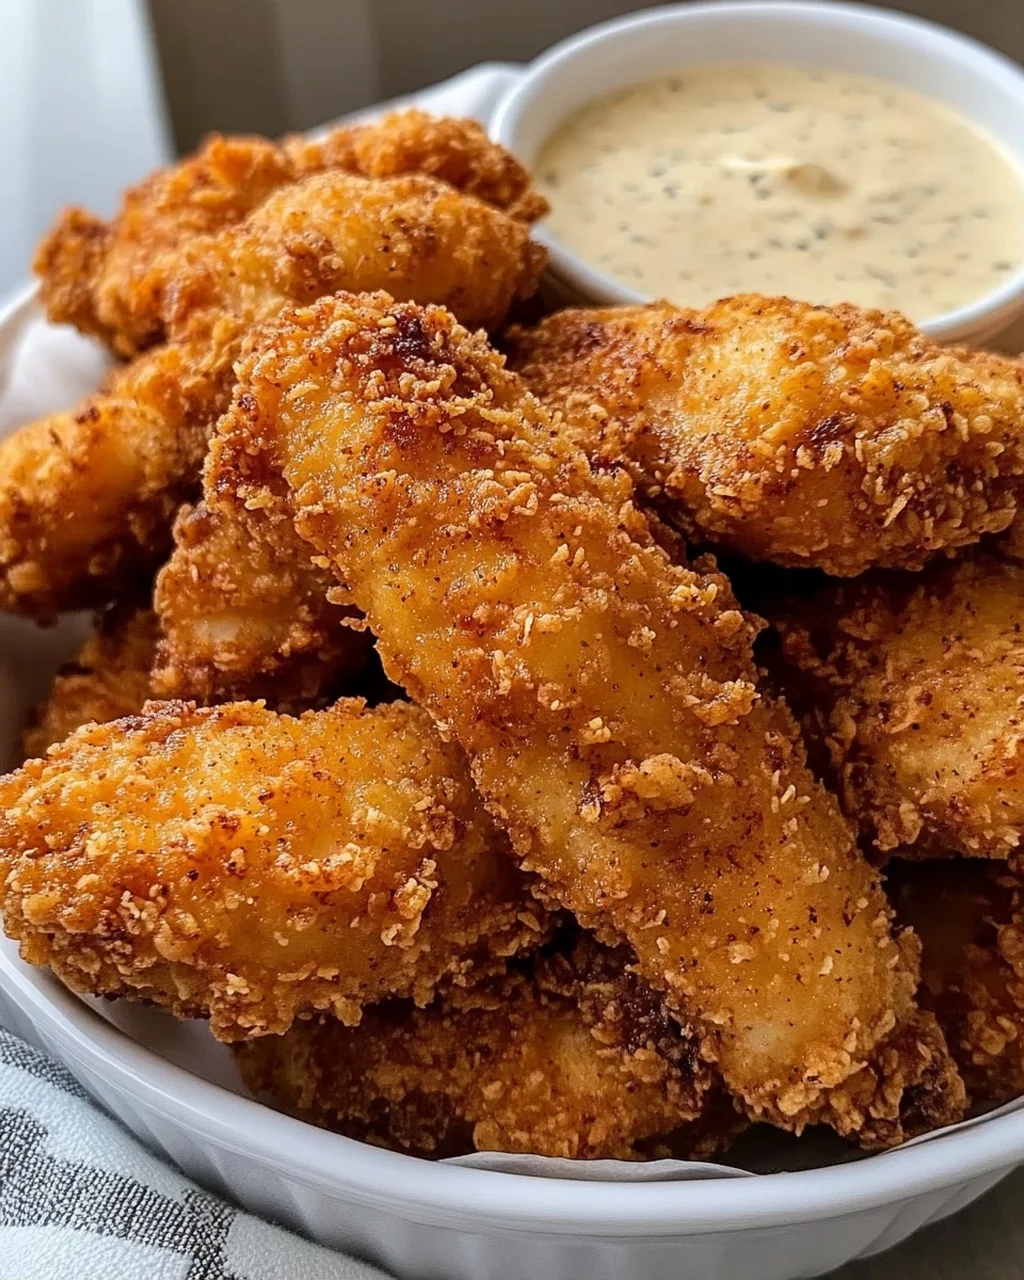
If you’re looking for a dish that brings smiles to the table, these Crispy Fried Chicken Tenders with Dipping Sauce are just the ticket! This recipe is one of my all-time favorites, perfect for busy weeknights or cozy family gatherings. The tenders are juicy on the inside and boast a delightful crunch on the outside, making them a hit with kids and adults alike. Plus, they’re easy to whip up, so you can enjoy homemade comfort food without spending hours in the kitchen.
What makes this dish even more special is how versatile it is. Whether you’re serving them as a quick snack, packing them for lunch, or presenting them at a weekend gathering, these tenders are always a crowd-pleaser.
Why You’ll Love This Recipe
- Quick to prepare: With just 20 minutes of prep time, you can have dinner on the table in no time.
- Family-friendly: Everyone loves crispy chicken tenders, making this dish a sure-fire winner for picky eaters.
- Great for leftovers: These tenders taste just as good reheated, so you can enjoy them again the next day.
- Customizable dipping sauce: The sauce is easy to make and pairs perfectly with the tenders; feel free to adjust it to your taste!
- Gluten-free option available: Simply swap out regular flour and breadcrumbs for gluten-free alternatives.

Ingredients You’ll Need
These ingredients are simple and wholesome, allowing you to create something truly delicious without any fuss. Let’s gather what we need for our Crispy Fried Chicken Tenders!
For the Chicken Tenders
- 1.5 pounds boneless (skinless chicken breasts), cut into uniform strips about 1 inch wide (approximately 6 to 8 tenders)
- 1 cup all-purpose flour (plus extra for dusting)
- 1 teaspoon garlic powder
- 1 teaspoon onion powder
- 1 teaspoon paprika
- 1 teaspoon salt (divided)
- ½ teaspoon black pepper
- 2 large eggs, beaten with 1 tablespoon of water
- 1 ½ cups panko breadcrumbs
For the Dipping Sauce
- ½ cup mayonnaise
- 2 tablespoons yellow mustard
- 1 tablespoon lemon juice, fresh squeezed
- 1 clove garlic, minced finely or pressed
- ¼ teaspoon salt (for sauce)
For Frying
- Vegetable oil or canola oil, for frying (about 3 to 4 cups)
Variations
This recipe is incredibly flexible! Here are some fun ideas to switch things up:
- Swap the protein: Try using turkey or chicken thighs instead of chicken breasts for a juicier bite.
- Add some spice: Mix in some cayenne pepper or hot sauce into your flour mixture if you’re craving a little heat.
- Herbs and spices: Experiment by adding dried herbs like thyme or oregano to your panko breadcrumbs for added flavor.
- Change up the dip: Instead of mayonnaise-based sauce, try a honey mustard or BBQ sauce for variety!
How to Make Crispy Fried Chicken Tenders with Dipping Sauce
Step 1: Prepare the Chicken
Pat the chicken strips completely dry with paper towels. This step is essential because moisture can prevent that lovely crispiness we’re after. Next, set up three shallow dishes: one filled with flour mixed with half of the salt and seasonings; another with beaten eggs; and finally, one with panko breadcrumbs mixed with the remaining salt.
Step 2: Coat the Chicken
Dredge each chicken strip in the seasoned flour first, shaking off any excess. Then dip it into the egg wash—this helps everything stick together nicely. Finally, press each tender firmly into the panko mixture until it’s well-coated on all sides. Placing them on a wire rack allows air circulation while you prepare to fry.
Step 3: Heat the Oil
Pour vegetable or canola oil into your Dutch oven or deep skillet until it’s no more than halfway full. Heat over medium-high until it reaches about 350°F (175°C). It’s vital not to overcrowd your pan during frying; this ensures each tender gets properly cooked and maintains its crispiness.
Step 4: Frying Time!
Carefully lower 3 to 4 tenders into the hot oil without overcrowding. Fry them for about 4 to 6 minutes while turning occasionally until they turn deep golden-brown and reach an internal temperature of 165°F (74°C). Once done, drain them on a wire rack to keep that crunch intact.
Step 5: Make Your Dipping Sauce
While your chicken rests, whisk together mayonnaise, yellow mustard, lemon juice, minced garlic, and a pinch of salt in a bowl. Letting it sit for about ten minutes allows those flavors to meld beautifully. Serve immediately alongside your hot chicken tenders!
Now you’re ready to enjoy these irresistible Crispy Fried Chicken Tenders with Dipping Sauce! They’re sure to become a favorite in your home too!
Pro Tips for Making Crispy Fried Chicken Tenders with Dipping Sauce
Cooking crispy fried chicken tenders can be a delightful experience, and with a few handy tips, you can achieve that restaurant-quality crunch right at home!
Use a thermometer: Keeping an eye on the oil temperature is crucial. If it’s too low, the chicken will absorb oil and become greasy; if it’s too high, it will burn. Aim for 350°F (175°C) for the perfect fry.
Let the chicken rest: After frying, allow the tenders to rest on a wire rack instead of paper towels. This keeps them crispy by allowing excess oil to drain while preventing steam from softening the coating.
Double-dip for extra crunch: For an even crunchier exterior, consider repeating the dredging process. After the first coating of panko breadcrumbs, dip the chicken back into the egg wash and then again into the breadcrumbs before frying.
Season every layer: Don’t forget to season each component—flour, eggs, and breadcrumbs. This ensures that every bite is flavorful rather than just relying on the dipping sauce for taste.
Fry in batches: Overcrowding the pan can lower the oil temperature and result in soggy tenders. Fry in small batches to maintain consistent cooking temperatures and crispiness.
How to Serve Crispy Fried Chicken Tenders with Dipping Sauce
Presenting your crispy fried chicken tenders beautifully can enhance your dining experience! Here are some great ways to serve them up.
Garnishes
- Fresh herbs: Chopped parsley or cilantro adds a pop of color and freshness that complements the rich flavor of the tenders.
- Lemon wedges: A squeeze of fresh lemon juice brightens up each bite, balancing out the richness of the fried chicken.
- Sliced pickles: Adding a few tangy pickle slices on the plate provides a crunchy contrast and enhances flavor with their acidity.
Side Dishes
- Crispy French Fries: Golden-brown fries are a classic pairing with chicken tenders. Their salty crunch complements the tender’s texture perfectly.
- Coleslaw: A refreshing coleslaw made with cabbage and carrots offers a cool, crunchy side that balances out the savory flavors of fried chicken.
- Corn on the Cob: Sweet corn on the cob can be grilled or boiled; its sweetness pairs nicely with spicy or savory dipping sauces.
- Macaroni and Cheese: Creamy mac and cheese adds comfort to your meal. It’s warm, cheesy goodness contrasts well with crispy chicken.
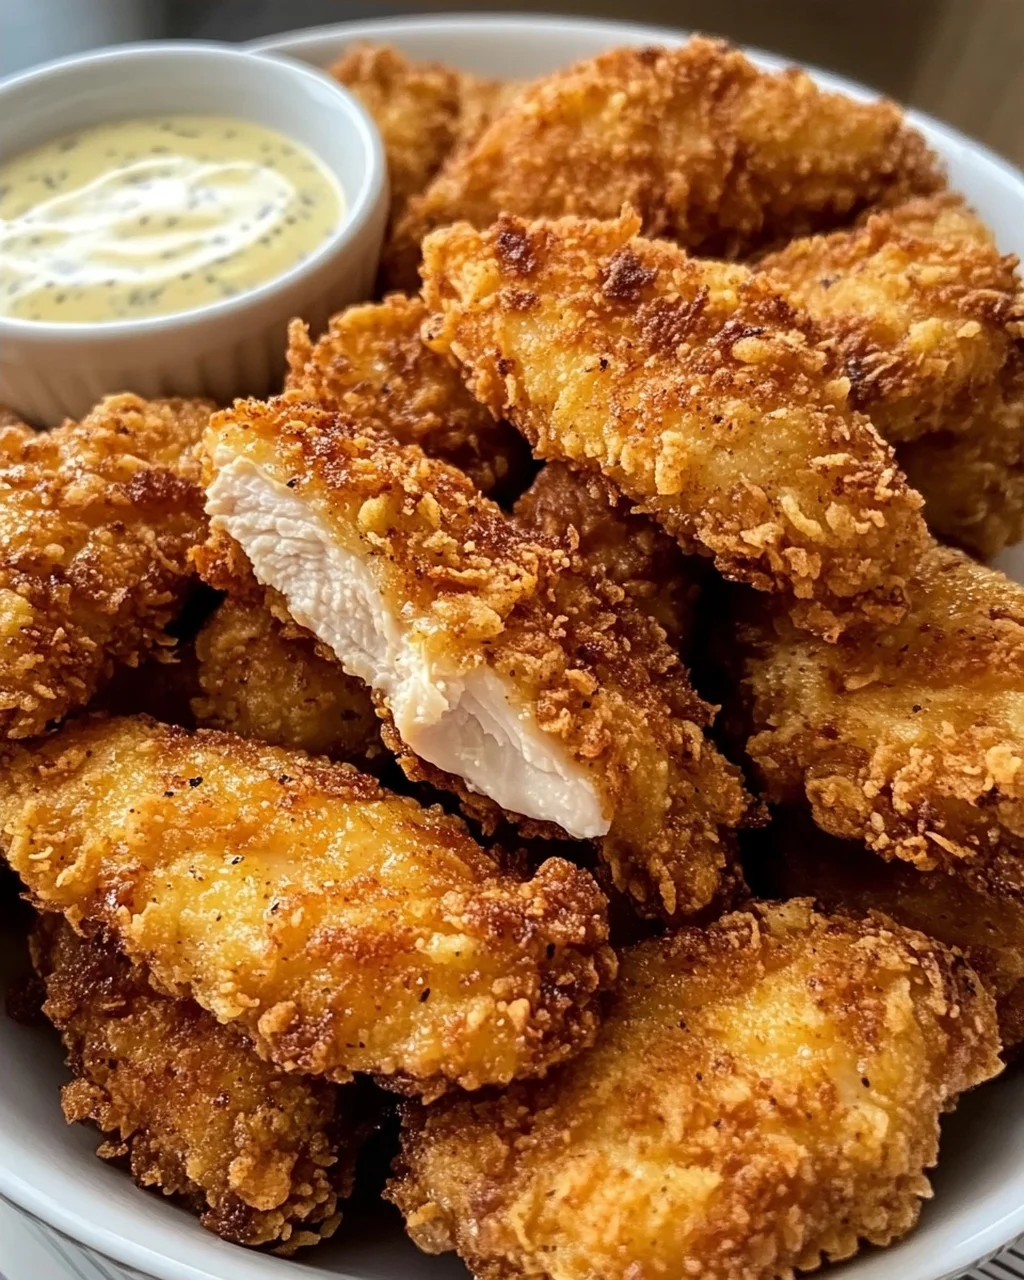
These serving ideas will not only make your meal visually appealing but also create a delightful balance of flavors and textures! Enjoy your crispy fried chicken tenders with dipping sauce—a dish that’s sure to please family and friends alike!
Make Ahead and Storage
This Crispy Fried Chicken Tenders with Dipping Sauce recipe is perfect for meal prep, allowing you to enjoy delicious homemade tenders any time of the week. Here’s how to store them properly and make the most out of your cooking efforts.
Storing Leftovers
- Place leftover chicken tenders in an airtight container.
- Store in the refrigerator for up to 3 days.
- Keep the dipping sauce in a separate sealed container for up to 5 days. Stir before serving.
Freezing
- Allow the cooked chicken tenders to cool completely.
- Arrange them in a single layer on a baking sheet and freeze until solid.
- Transfer the frozen tenders to a freezer-safe bag or container, removing as much air as possible.
- They can be stored in the freezer for up to 2 months.
Reheating
- Preheat your oven to 400°F (200°C) or air fryer to 375°F (190°C).
- Place the chicken tenders on a baking sheet lined with parchment paper or directly in the air fryer basket.
- Heat for about 10-15 minutes, or until they regain their crispy texture and are heated through.
FAQs
Here are some common questions you might have about this recipe:
Can I make crispy fried chicken tenders with dipping sauce ahead of time?
Absolutely! You can prepare these chicken tenders in advance, store them, and reheat them when you’re ready to serve. This makes them great for meal prep!
What is the best way to keep crispy fried chicken tenders with dipping sauce fresh?
To keep your crispy fried chicken tenders fresh, store them in an airtight container in the refrigerator. For longer storage, freeze them and reheat as needed.
Can I use different spices for my chicken tenders?
Yes! Feel free to customize the seasoning blend according to your taste preferences. Spices like cayenne pepper or Italian herbs can add a unique twist.
Are there any gluten-free options for crispy fried chicken tenders with dipping sauce?
Definitely! Substitute all-purpose flour and panko breadcrumbs with certified gluten-free alternatives, ensuring everyone can enjoy this dish.
How do I achieve extra crispy chicken tenders?
For extra crispiness, ensure that your oil is hot enough before frying and use panko breadcrumbs as they provide a delightful crunch. Also, allowing the coated chicken strips to rest before frying helps achieve that perfect texture.
Final Thoughts
I hope you find joy in making these Crispy Fried Chicken Tenders with Dipping Sauce! This recipe not only brings comfort but also creates wonderful moments around the dinner table. Remember that cooking is about having fun and experimenting, so don’t hesitate to make it your own. Enjoy every crunchy bite, and happy cooking!

Crispy Chicken Tenders
- Total Time: 40 minutes
- Yield: 7 servings 1x
Description
Deliciously crispy chicken tenders with a flavorful dipping sauce.
Ingredients
- 1.5 pounds boneless skinless chicken breasts, cut into strips (about 1 inch wide)
- 1 cup all-purpose flour (plus extra for dusting)
- 1 teaspoon garlic powder
- 1 teaspoon onion powder
- 1 teaspoon paprika
- 1 teaspoon salt (divided)
- 0.5 teaspoon black pepper
- 2 large eggs, beaten (with 1 tablespoon of water)
- 1.5 cups panko breadcrumbs
- 3–4 cups vegetable or canola oil (for frying)
- 0.5 cup mayonnaise
- 2 tablespoons yellow mustard
- 1 tablespoon lemon juice (fresh squeezed)
- 1 clove garlic (minced finely or pressed)
- 0.25 teaspoon salt (for sauce)
Instructions
- Pat the chicken strips completely dry with paper towels and set up three shallow dishes: one with flour mixed with half the salt, garlic powder, onion powder, paprika, and black pepper; a second with the beaten eggs and 1 tablespoon of water; and a third with panko breadcrumbs mixed with the remaining salt.
- Dredge the chicken in the seasoned flour, shaking off excess, then dip into the egg wash allowing excess to drip off, and finally press firmly into the panko mixture to coat all sides before placing on a wire rack.
- Pour vegetable or canola oil into a heavy-bottomed Dutch oven or deep skillet filling it no more than halfway, and heat over medium-high heat until it reaches 350°F (175°C).
- Carefully lower 3 to 4 tenders into the hot oil without overcrowding, frying for 4 to 6 minutes while turning occasionally until deep golden-brown and the internal temperature reaches 165°F (74°C), then drain on a wire rack.
- While the chicken rests, whisk together the mayonnaise, yellow mustard, lemon juice, minced garlic, and ¼ teaspoon salt for the sauce, let it sit for 10 minutes to meld flavors, and serve immediately with the hot tenders.
- Prep Time: 20 minutes
- Cook Time: 20 minutes
- Category: Main Course
- Cuisine: American
Nutrition
- Serving Size: 1
- Calories: 350
- Sugar: 1
- Sodium: 800
- Fat: 15
- Saturated Fat: 3
- Unsaturated Fat: 7
- Trans Fat: 0
- Carbohydrates: 30
- Fiber: 2
- Protein: 25
- Cholesterol: 150
Keywords: Leftover tenders can be stored in an airtight container in the refrigerator for up to 3 days; reheat in a 400°F (200°C) oven or air fryer at 375°F (190°C) to restore crispness, avoiding the microwave. The dipping sauce should be stored separately in a sealed container in the fridge for up to 5 days and stirred well before serving as separation may occur. For a gluten-free version, substitute the all-purpose flour and panko with certified gluten-free alternatives.