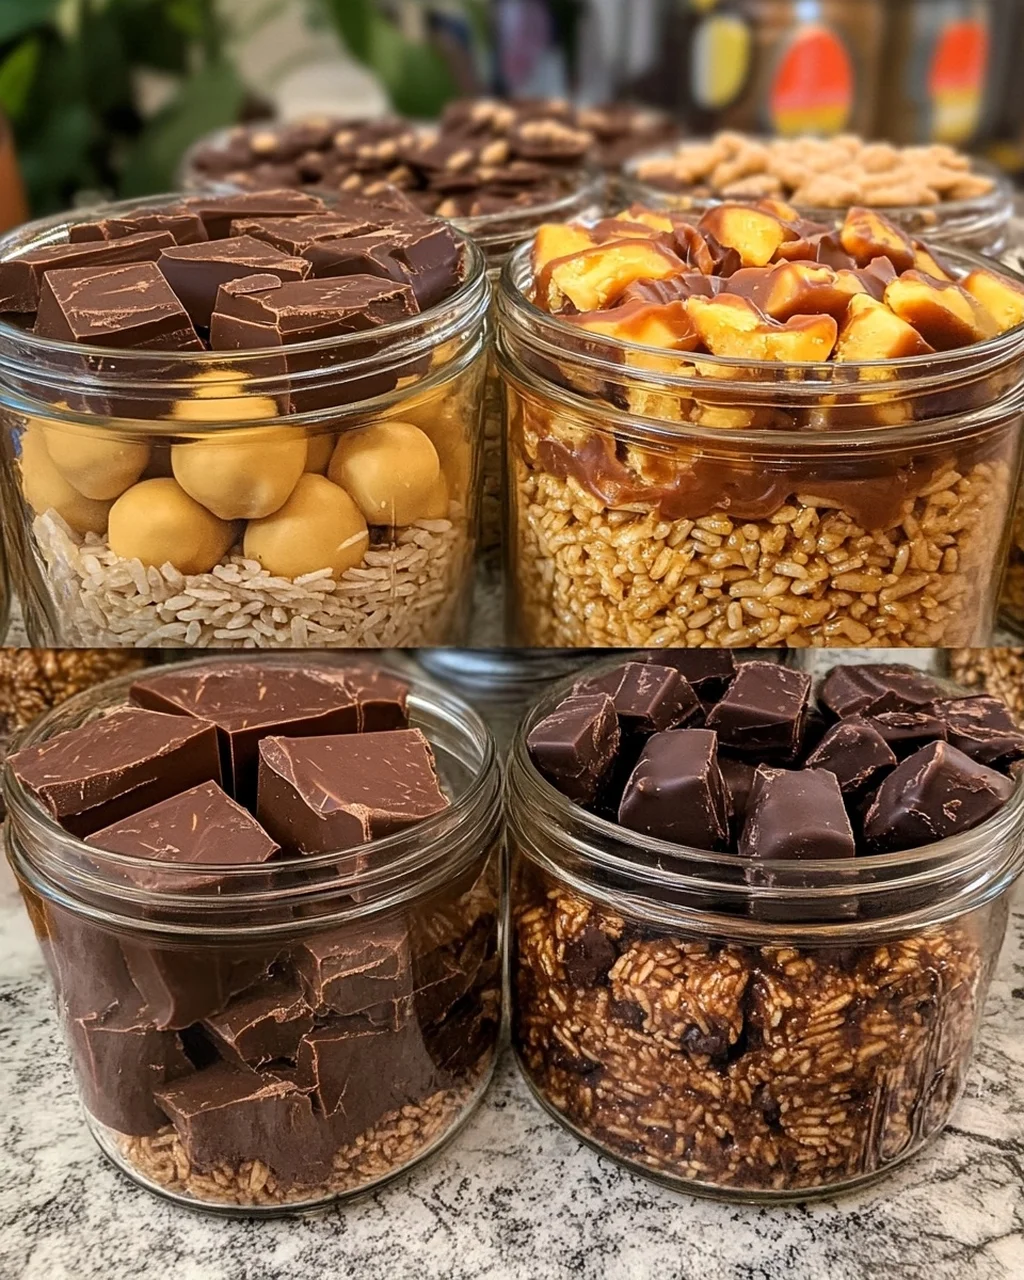
If you’re looking for a fun and delicious way to enjoy some classic candy bar flavors, then you’re in for a treat with these Homemade Candy Bar Jars! This recipe combines the joy of making something from scratch with the nostalgia of your favorite sweet treats. Perfect for family gatherings, movie nights, or simply as a delightful pick-me-up after a long day, these jars are not just visually appealing but also packed with flavor.
What makes this recipe so special is that it allows you to recreate beloved candy bars in a unique and shareable format. Just imagine layering those creamy, crunchy, and chocolatey goodness right in front of your eyes! With just a bit of time and some simple ingredients, you’ll have a sweet masterpiece ready to impress everyone.
Why You’ll Love This Recipe
- Easy to Prepare: With straightforward steps, you can whip up these jars even on busy weeknights.
- Family-Friendly Appeal: Kids and adults alike will love digging into their own jar filled with layers of sweetness!
- Make-Ahead Convenience: These jars can be made in advance and stored for later, making them perfect for parties or gifts.
- Customizable Flavors: Feel free to get creative with your layers and toppings to suit your taste!

Ingredients You’ll Need
Gathering the right ingredients is key, and thankfully, this recipe uses simple, wholesome items that you likely already have on hand. Let’s take a look at what you’ll need to create your delicious Homemade Candy Bar Jars!
For Snickers Bars Layer
- 1 cup roasted salted peanuts (coarsely chopped)
- 1/2 cup granulated sugar
- 1/4 cup light corn syrup
- 1/4 cup unsalted butter
- 1/4 cup heavy cream
- 1/2 teaspoon sea salt
- 8 ounces milk chocolate chips
- 1 tablespoon shortening (optional, for smoother melting)
For Reese’s Cups Layer
- 1 cup creamy peanut butter
- 1/2 cup powdered sugar
- 1/4 cup unsalted butter (softened)
- 1/2 teaspoon vanilla extract
- Pinch of salt
- 10 ounces semi-sweet chocolate chips
- 1 tablespoon vegetable oil
For Baby Ruths Layer
- 4 cups puffed rice cereal
- 1/2 cup roasted peanuts (chopped)
- 1/2 cup unsalted butter
- 1 bag (10 oz vegan marshmallows)
- 1/2 cup brown sugar
- 1/4 cup light corn syrup
- 8 ounces milk chocolate chips
For Rice Krispie Treats Layer
- 6 cups Rice Krispies cereal
- 1/2 cup unsalted butter
- 1 bag (10 oz mini vegan marshmallows)
- 1/2 teaspoon vanilla extract
- Pinch of salt
- 4 ounces white chocolate chips (for drizzling)
Variations
One of the best things about Homemade Candy Bar Jars is how flexible they are! You can easily adapt the flavors and ingredients based on what you love or what you have on hand. Here are some fun ideas to mix things up:
- Try Different Nuts: Substitute almonds or cashews for peanuts if you’re feeling adventurous.
- Add Dried Fruits: Toss in some dried cranberries or cherries for a fruity twist!
- Explore Different Chocolates: Use dark chocolate or even white chocolate for different flavor profiles.
- Switch Up the Base: Instead of rice cereal, try using granola or crushed cookies as a crunchy layer.
How to Make Homemade Candy Bar Jars
Step 1: Prepare the Snickers Bars Layer
In a medium saucepan over medium heat, combine the sugar, corn syrup, butter, heavy cream, and sea salt; stirring constantly until the butter melts and everything comes together beautifully. Once it boils, reduce the heat to low and let it simmer for about 5 minutes. This step is essential as it thickens the caramel mixture. Afterward, stir in those delicious chopped peanuts. The warm caramel combined with crunchy nuts creates an irresistible base!
Step 2: Create the Reese’s Cups Layer
In a large bowl, mix together peanut butter, powdered sugar, softened butter, vanilla extract, and a pinch of salt until it’s smooth and creamy. This mixture is like magic! It’s rich and full of flavor—perfectly reminiscent of classic peanut butter cups. Scoop out small portions and roll them into balls before placing them on a tray lined with parchment paper. Pop them into the freezer for about 15 minutes until firm; this helps maintain their shape when dipped in chocolate.
Step 3: Assemble the Baby Ruths Layer
Melt some unsalted butter in a large pot over medium heat before adding brown sugar and corn syrup. Stir until dissolved; then toss in those vegan marshmallows while continuously stirring until completely melted! This gooey mixture needs to be mixed with puffed rice cereal and chopped peanuts until every piece is coated nicely. Spoon it into your jars firmly; this will give structure when serving.
Step 4: Make the Rice Krispie Treats Layer
In another large pot over low heat, melt your butter before adding mini vegan marshmallows. Stir until smooth—this step is super important because it creates that classic Rice Krispie treat texture! Once melted, remove from heat and add vanilla extract along with salt before gently folding in Rice Krispies cereal until well combined. Press this mixture into your jars lightly so that they hold together nicely. Finally, melt some white chocolate chips and drizzle them over each jar for an extra touch of sweetness!
And there you have it—your very own Homemade Candy Bar Jars! Enjoy sharing these delightful treats with friends and family or keep them all to yourself; we won’t tell!
Pro Tips for Making Homemade Candy Bar Jars
Creating these delightful jars is not only fun but also incredibly rewarding. With a few handy tips, you can ensure your candy bar jars turn out perfectly every time!
Prep Your Ingredients: Having everything measured and ready before you start helps streamline the process and makes it more enjoyable. It prevents any last-minute scrambling for ingredients while you’re in the middle of melting chocolate or mixing.
Use Quality Chocolate: Whether it’s milk, semi-sweet, or white chocolate, opting for high-quality brands ensures a richer flavor and smoother texture. Good chocolate melts better and enhances the overall taste of your candy jars.
Let Layers Set: Allowing each layer to set before adding the next one helps maintain distinct layers and prevents them from blending together. This creates a beautiful presentation that showcases each component of your candy bars.
Experiment with Flavors: Don’t hesitate to add your favorite flavors or ingredients to personalize your jars! A sprinkle of sea salt, a dash of cinnamon, or even some crushed candies can take these treats to another level.
Seal for Freshness: If you’re making these jars ahead of time, seal them tightly after they have cooled completely. This keeps them fresh and delicious when you’re ready to enjoy or share them.
How to Serve Homemade Candy Bar Jars
These Homemade Candy Bar Jars are as visually appealing as they are delicious! They make for a perfect centerpiece at gatherings or a thoughtful gift for loved ones. Here are some fun ways to present them:
Garnishes
- Chopped Nuts: Sprinkle some extra chopped nuts on top for added texture and crunch.
- Chocolate Drizzle: A quick drizzle of melted chocolate over the top not only enhances the visual appeal but adds an irresistible richness.
- Edible Flowers: For a touch of elegance, consider adding edible flowers on top; they bring color and freshness to your jars.
Side Dishes
Fresh Fruit Salad: A refreshing fruit salad can balance the sweetness of the candy jars. Try combining seasonal fruits like berries, melons, and citrus for a vibrant mix.
Vanilla Ice Cream: Serve your candy bar jars alongside creamy vanilla ice cream. The contrast in temperature and texture creates a delightful experience.
Hot Cocoa: Pairing these treats with a steaming cup of hot cocoa makes for a cozy dessert setting—perfect for chilly evenings!
Popcorn: Offer caramel or chocolate-drizzled popcorn as a fun side dish. Its light and airy texture complements the rich flavors of the candy jars beautifully.
With these serving suggestions and tips, you’ll be all set to impress friends and family with your Homemade Candy Bar Jars! Enjoy every moment spent creating this sweet masterpiece.
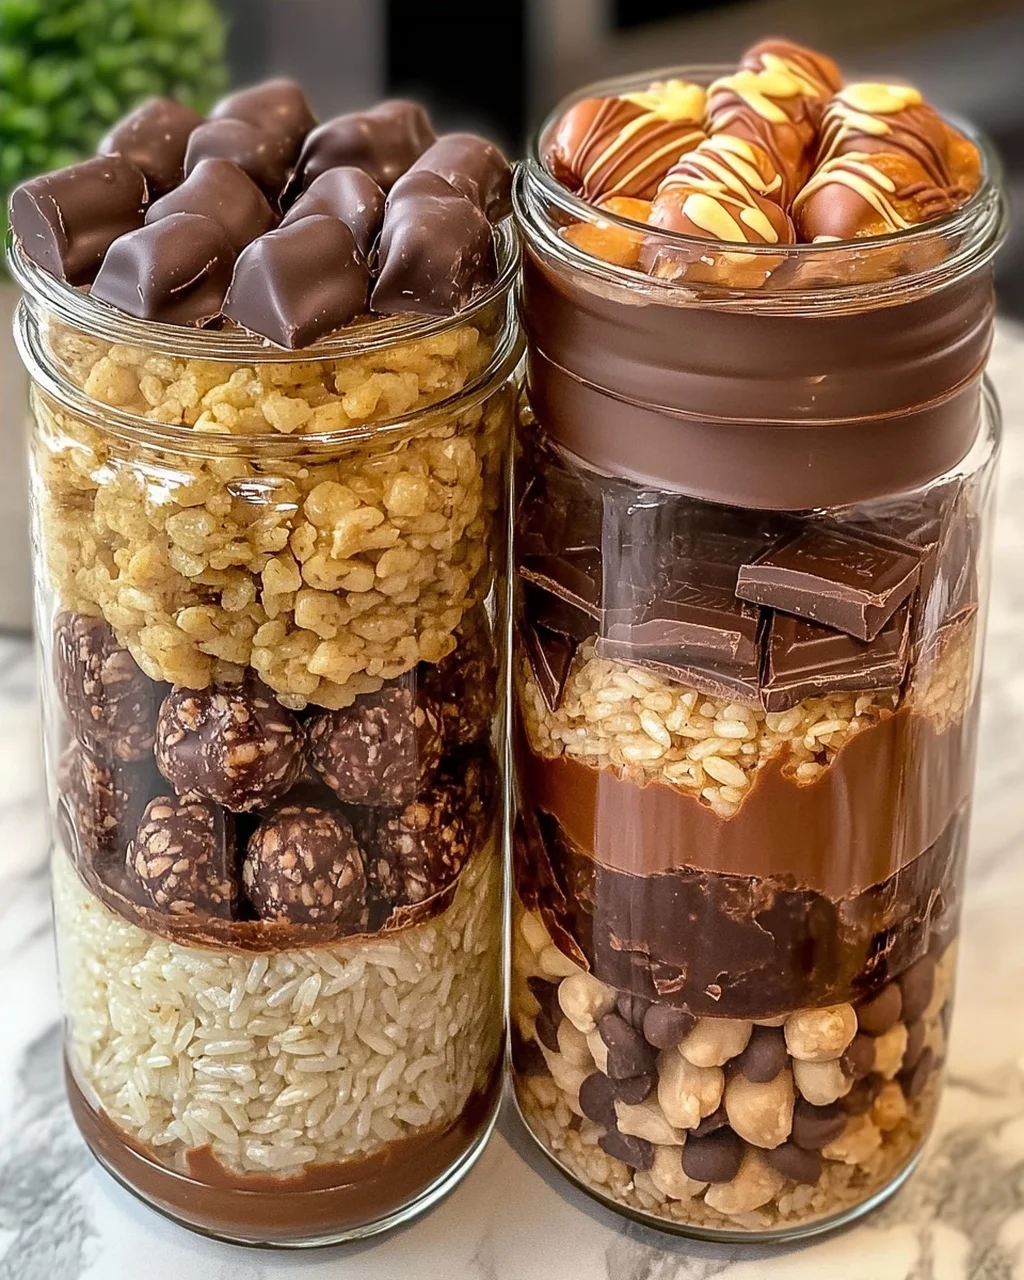
Make Ahead and Storage
These Homemade Candy Bar Jars are perfect for meal prep, allowing you to create delicious treats in advance and enjoy them throughout the week. Whether you’re planning for a party or just want to have some tasty snacks on hand, these jars make it easy to indulge without the hassle of making sweets from scratch every time.
Storing Leftovers
- Store the jars in an airtight container at room temperature.
- Enjoy them within one week for the best quality and flavor.
- If you’re concerned about the chocolate melting, keep them in a cool place.
Freezing
- You can freeze individual jars for longer storage.
- Ensure they are sealed tightly to avoid freezer burn.
- Thaw at room temperature before enjoying.
Reheating
- There’s no need to reheat these treats. Enjoy them as is!
- If you prefer a warm texture, microwave for a few seconds but be cautious not to overheat.
FAQs
Here are some common questions you might have about making Homemade Candy Bar Jars!
Can I customize my Homemade Candy Bar Jars?
Absolutely! Feel free to swap out ingredients based on your preferences or dietary needs. You can add different nuts, use dark chocolate instead of milk chocolate, or even include dried fruits for added flavor.
How long do Homemade Candy Bar Jars last?
When stored properly in an airtight container at room temperature, your Homemade Candy Bar Jars will stay fresh for up to one week. For longer storage, consider freezing them!
Are Homemade Candy Bar Jars suitable for gifting?
Yes! These jars make a delightful gift. Just decorate the jar with a ribbon or label, and they’re ready to share with loved ones.
What if I don’t have all the ingredients for Homemade Candy Bar Jars?
No worries! You can easily substitute ingredients based on what you have available. For example, use different types of nut butter or chocolate chips according to your taste.
Final Thoughts
Creating these Homemade Candy Bar Jars is not just about satisfying your sweet tooth; it’s also about bringing back fond memories and sharing joy with friends and family. I hope this recipe inspires you to get creative in the kitchen and enjoy every delicious layer of these delightful treats. Happy candy-making!

Homemade Candy Bar Jars
- Total Time: 1 hour 15 minutes
- Yield: 4 servings 1x
Description
A delightful homemade version of classic candy bars, layered in jars for a fun and shareable treat.
Ingredients
- 1 cup roasted salted peanuts (coarsely chopped)
- 1/2 cup granulated sugar
- 1/4 cup light corn syrup
- 1/4 cup unsalted butter
- 1/4 cup heavy cream
- 1/2 teaspoon sea salt
- 8 ounces milk chocolate chips
- 1 tablespoon shortening (optional, for smoother melting)
- 1 cup creamy peanut butter
- 1/2 cup powdered sugar
- 1/4 cup unsalted butter (softened)
- 1/2 teaspoon vanilla extract
- 1 pinch salt
- 10 ounces semi-sweet chocolate chips
- 1 tablespoon vegetable oil
- 4 cups puffed rice cereal
- 1/2 cup roasted peanuts (chopped)
- 1/2 cup unsalted butter
- 1 bag (10 oz) marshmallows
- 1/2 cup brown sugar
- 1/4 cup light corn syrup
- 8 ounces milk chocolate chips
- 6 cups Rice Krispies cereal
- 1/2 cup unsalted butter
- 1 bag (10 oz) mini marshmallows
- 1/2 teaspoon vanilla extract
- 1 pinch salt
- 4 ounces white chocolate chips (for drizzling)
Instructions
- In a medium saucepan over medium heat, combine the sugar, corn syrup, butter, heavy cream, and sea salt; stir constantly until the butter melts and the mixture comes to a boil. Reduce heat to low and simmer for 5 minutes, stirring occasionally, until the caramel thickens slightly. Remove from heat and stir in the chopped peanuts immediately. Melt the milk chocolate chips and shortening in a microwave-safe bowl in 30-second intervals, stirring between each interval until smooth. To assemble the jar, place a layer of the peanut caramel mixture at the bottom, followed by a drizzle of melted chocolate. Repeat layers until the jar is full, finishing with a top layer of chocolate. Allow the jars to sit at room temperature for 30 minutes to set before serving.
- In a large bowl, beat the peanut butter, powdered sugar, softened butter, vanilla, and salt together until smooth and creamy. Scoop small portions of the peanut butter mixture (about 1 tablespoon each) and roll them into balls. Place them on a parchment-lined tray and freeze for 15 minutes to firm up. Melt the chocolate chips and vegetable oil in a double boiler or microwave, stirring until completely smooth. Place a frozen peanut butter ball into the bottom of a small jar. Pour melted chocolate over it until fully covered. If making multiple layers, let the first layer set slightly before adding another peanut butter ball. Refrigerate the jars for at least 30 minutes to allow the chocolate to harden completely before serving.
- In a large pot, melt the butter over medium heat. Add the brown sugar and corn syrup, stirring until dissolved. Add the marshmallows to the pot and stir continuously until they are fully melted and the mixture is smooth. Remove from heat and fold in the puffed rice cereal and chopped peanuts until evenly coated. Spoon the mixture into the bottom of a jar, pressing down firmly to create a compact layer. Melt the chocolate chips and pour over the cereal mixture, covering it completely. Allow to cool at room temperature until the chocolate sets.
- Melt the butter in a large pot over low heat. Add the mini marshmallows and stir until completely melted and smooth. Remove from heat and stir in the vanilla extract and salt. Add the Rice Krispies cereal to the pot and fold gently until all the cereal is coated with the marshmallow mixture. Spoon the mixture into a jar, pressing it down gently to fill the space without crushing the cereal too much. Melt the white chocolate chips and drizzle over the top of the treat in the jar. Let it set before serving.
- Prep Time: 30 minutes
- Cook Time: 45 minutes
Nutrition
- Serving Size: 1
Keywords: Snickers Bars Tips: If the caramel hardens too quickly after removing it from the heat, gently reheat it over low heat for a few seconds to make it easier to spread in the jar. Reese's Cups Tips: Ensure the peanut butter balls are very cold before dipping them in chocolate; this prevents the chocolate from melting the center and keeps the shape intact. Baby Ruths Tips: Press the cereal mixture down firmly in the jar to prevent it from falling apart.