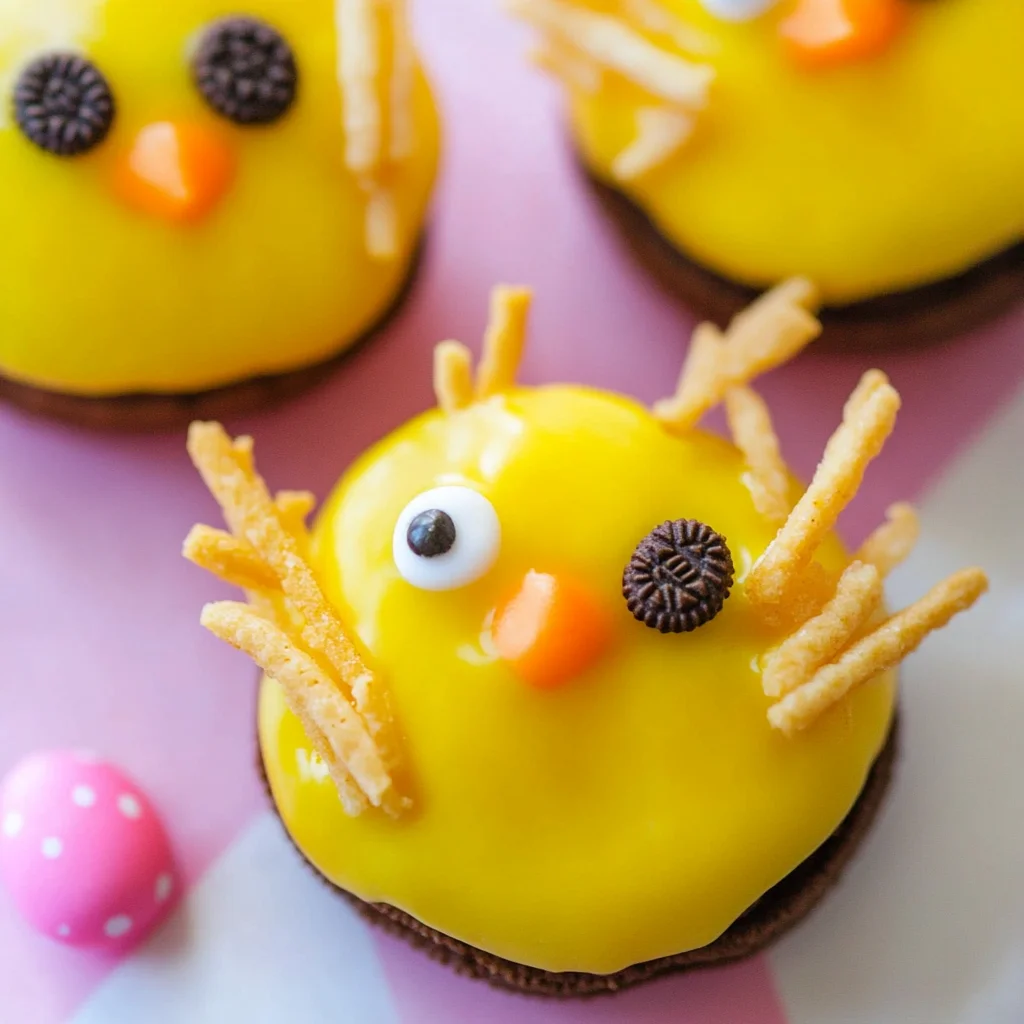
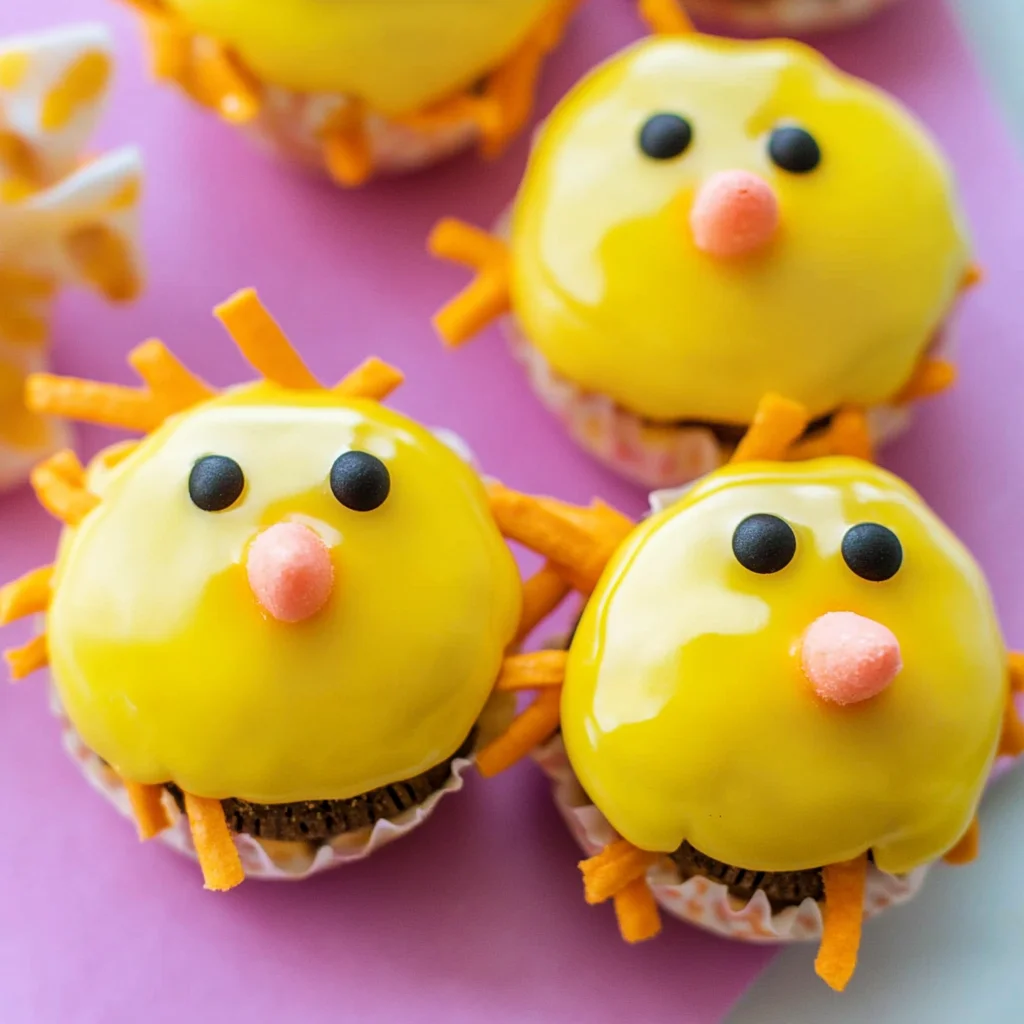
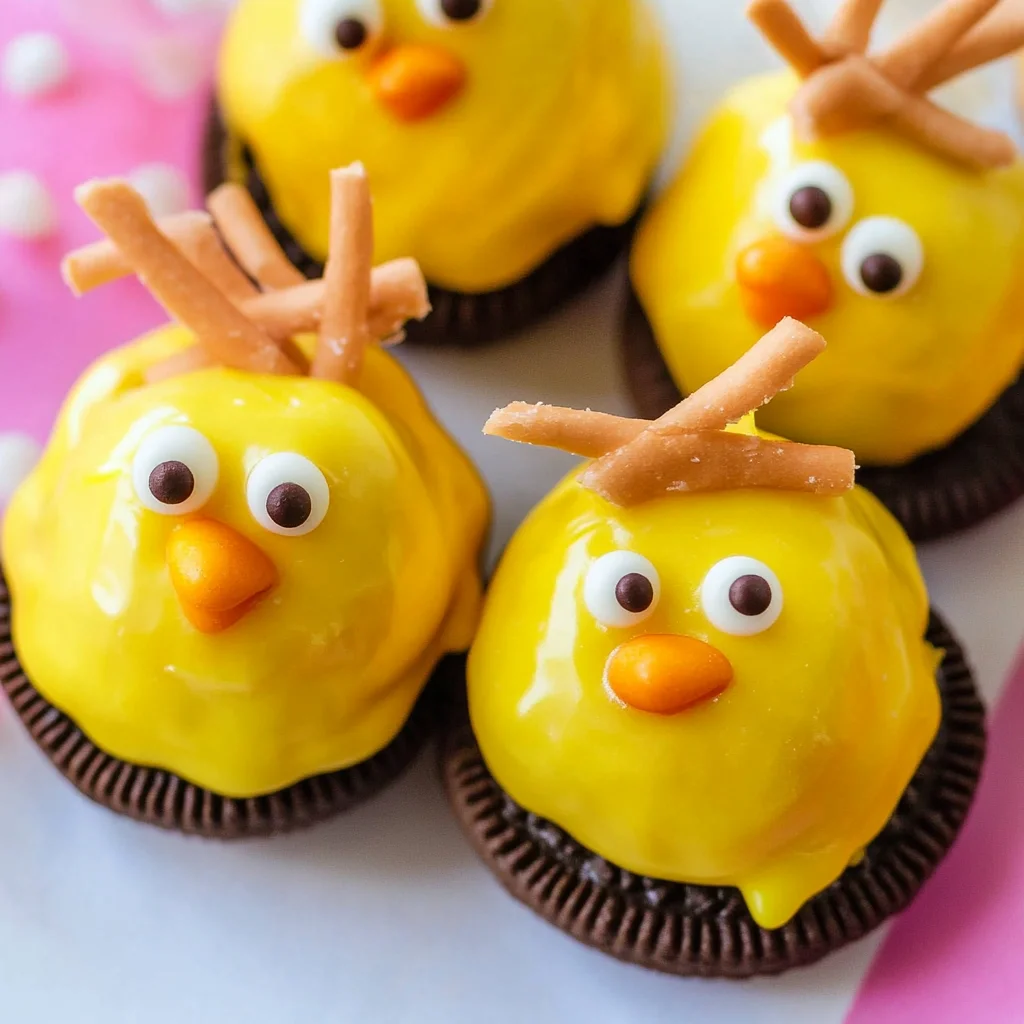
Oreo Easter Chicks are a delightful and creative way to celebrate the Easter season. These adorable treats transform classic Oreo cookies into playful little chicks using vibrant yellow candy melts and pretzel sticks. Perfect for parties, family gatherings, or simply to enjoy at home, these snacks are not only fun to make but also a hit with both kids and adults. Their bright colors and cute designs make them a standout addition to any Easter celebration.
Why You’ll Love This Recipe
- Easy to Make: With just a few simple steps, you can create these charming treats in no time.
- Fun for Kids: Involve the little ones in decorating their own Oreo Easter Chicks; it’s a great way to bond!
- Customizable: Feel free to get creative! Use different toppings or colors to suit your theme.
- Perfect for Any Occasion: While they shine during Easter, these chicks can be made year-round for various festivities.
- Deliciously Sweet: The combination of creamy Oreos and rich candy melts is sure to satisfy any sweet tooth.
Tools and Preparation
Before diving into this fun recipe, gather your essential tools. Having everything ready will streamline the process and ensure a smooth experience.
Essential Tools and Equipment
- Baking sheet
- Wax paper
- Microwave-safe bowl
- Fork or dipping tool
Importance of Each Tool
- Baking sheet: Provides a flat surface for cooling your Oreo Easter Chicks after decorating.
- Wax paper: Prevents sticking and makes cleanup easier when setting the dipped cookies.
- Microwave-safe bowl: Ensures safe melting of candy melts without risk of damage or burns.
Ingredients
Oreo Easter Chicks are a super fun way to turn oreo cookies into a delicious Easter treat using yellow candy melts and pretzel sticks.
For the Chick Body
- 1-2 bags yellow candy melts
- 1 package double-stuff oreos
For the Eyes
- Mini chocolate chips
For the Legs
- Thin pretzel rods (broken into short pieces)
For the Beak
- Orange decorating gel or orange candy melts

How to Make Oreo Easter Chicks
Step 1: Melt the Candy Melts
Melt the yellow candy melts according to package directions. This usually involves microwaving them in 30-second intervals until smooth.
Step 2: Dip the Oreos
Place a piece of wax paper on a baking sheet. Dip each Oreo cookie into the melted yellow candy melts, ensuring that it is completely covered.
Step 3: Add Legs and Eyes
Once dipped, place the Oreos on the wax paper. Quickly stick two pretzel pieces into each cookie for legs. Then add two mini chocolate chips as eyes before the candy coating sets.
Step 4: Create Beaks
Using orange decorating gel or melted orange candy melts, carefully pipe small beaks onto each chick.
Step 5: Set in Refrigerator
Place your decorated Oreos in the refrigerator to set for about 15 minutes, allowing them to harden properly before serving.
Enjoy your charming Oreo Easter Chicks with family and friends!
How to Serve Oreo Easter Chicks
Oreo Easter Chicks make for an adorable and festive treat perfect for any Easter celebration. Here are some fun serving suggestions to enhance your presentation.
On a Decorative Platter
- Arrange the chicks on a colorful platter surrounded by artificial grass for an eye-catching centerpiece.
Individual Treat Bags
- Place each chick in a small clear bag tied with a pastel ribbon. These make great party favors for guests.
Nestled in Mini Cups
- Serve the chicks in small paper or plastic cups, adding a sprinkle of shredded coconut as nesting material for extra flair.
With a Themed Cake
- Pair these treats with an Easter-themed cake to create a dessert table that impresses all your guests.
Alongside Fresh Fruit
- Present the chicks with sliced fruits like strawberries or kiwi for a fresh, vibrant contrast that balances the sweetness.
How to Perfect Oreo Easter Chicks
For the best results when making Oreo Easter Chicks, follow these helpful tips.
- Use Double-Stuff Oreos: The extra filling helps keep the cookies together and enhances flavor.
- Melt Candy Slowly: Heat candy melts in short intervals in the microwave to avoid burning. Stir frequently until smooth.
- Work Quickly: Once dipped, quickly add pretzel legs and chocolate chip eyes before the candy coating sets.
- Chill Before Serving: Refrigerate the chicks after decorating to help them firm up and maintain their shape.
Best Side Dishes for Oreo Easter Chicks
To complement your Oreo Easter Chicks, consider these delightful side dishes that will round out your holiday spread.
- Deviled Eggs: A classic addition that pairs well with sweet treats; sprinkle with paprika for color.
- Carrot Sticks and Hummus: Fresh and crunchy carrots served with creamy hummus provide a healthy contrast.
- Fruit Salad: A mix of seasonal fruits adds freshness and balances out the sugar from the chicks.
- Mini Quiches: Bite-sized quiches filled with veggies or cheese offer savory options alongside your sweets.
- Cheese Platter: An assortment of cheeses can cater to various tastes, making it a versatile choice.
- Vegetable Platter: Colorful veggies with dip can be both nutritious and appealing next to your treats.
Common Mistakes to Avoid
Making Oreo Easter Chicks can be fun, but some common mistakes can ruin your experience. Here are a few to watch out for:
- Not melting candy melts properly: Ensure you follow the package instructions for melting. Overheating can cause them to seize, making it difficult to dip the Oreos.
- Skipping the wax paper: Always use wax paper on your baking sheet. This prevents sticking and makes cleanup easier after your Oreo Easter Chicks have set.
- Ignoring the setting time: Don’t rush the process! Placing your treats in the refrigerator is essential for allowing the candy melts to harden properly.
- Using stale Oreos: Fresh ingredients make a difference. Check that your Oreos are not past their expiration date for the best taste and texture.
- Not customizing decorations: Feel free to get creative! Using different colors or types of candy melts can make your Oreo Easter Chicks unique and festive.
Refrigerator Storage
- Store your Oreo Easter Chicks in an airtight container.
- They will stay fresh for up to 1 week in the refrigerator.
- Place parchment paper between layers if stacking them to prevent sticking.
Freezing Oreo Easter Chicks
- You can freeze these treats for up to 2 months.
- Use a freezer-safe container to maintain freshness.
- Separate layers with wax paper to avoid damage during freezing.
Reheating Oreo Easter Chicks
- Oven: Preheat to 200°F (93°C) and warm for about 5-10 minutes. This method helps maintain texture without melting too much.
- Microwave: Heat on low power in short bursts of 10-15 seconds. Check frequently to avoid overheating.
- Stovetop: Not recommended as it may cause uneven heating and melting of the candy coating.
Frequently Asked Questions
What are Oreo Easter Chicks?
Oreo Easter Chicks are delightful treats made by dipping Oreos in yellow candy melts and decorating them to look like cute chicks, perfect for Easter celebrations.
Can I use other types of cookies?
Yes, while this recipe uses double-stuff Oreos, you can experiment with other cookies like Nutter Butter or even chocolate-covered biscuits for variety.
How can I customize my Oreo Easter Chicks?
Feel free to use different colors of candy melts or add additional decorations such as edible glitter or sprinkles for a festive touch.
How long do these treats last?
When stored properly in an airtight container, Oreo Easter Chicks can last up to one week in the refrigerator and two months in the freezer.
Are there any allergy concerns with this recipe?
The main allergens include dairy and gluten found in Oreos and candy melts. Always check labels if you have dietary restrictions or allergies.
Final Thoughts
Oreo Easter Chicks are not only adorable but also versatile, making them perfect for any spring celebration. You can easily customize them with various decorations or flavors, ensuring they fit any occasion. Try making these delightful treats this Easter season; they’re sure to be a hit!

Oreo Easter Chicks
- Total Time: 20 minutes
- Yield: Makes approximately 12 Oreo Easter Chicks 1x
Description
Oreo Easter Chicks are a whimsical and delightful treat that brings a splash of color and fun to your Easter celebrations. These adorable snacks turn classic double-stuff Oreos into charming little chicks, complete with bright yellow candy melts and pretzel legs. Easy to make and perfect for involving kids in the kitchen, these treats can be customized with various decorations to match any festive theme. Whether you’re hosting an Easter party or looking for a fun family activity, Oreo Easter Chicks are sure to impress both young and old alike. They’re not only visually appealing but also irresistibly delicious, making them a must-try this holiday season.
Ingredients
- 1–2 bags yellow candy melts
- 1 package double-stuff Oreos
- Mini chocolate chips (for eyes)
- Thin pretzel rods (broken for legs)
- Orange decorating gel or orange candy melts (for beaks)
Instructions
- Melt the yellow candy melts according to package directions in a microwave-safe bowl.
- Dip each Oreo cookie into the melted candy until fully coated, then place it on wax paper.
- Quickly insert two broken pretzel pieces into each cookie for legs, followed by two mini chocolate chips as eyes.
- Use orange decorating gel or melted orange candy melts to pipe small beaks onto each chick.
- Refrigerate for about 15 minutes to allow the coating to set before serving.
- Prep Time: 20 minutes
- Cook Time: 0 minutes
- Category: Dessert
- Method: No cooking required
- Cuisine: American
Nutrition
- Serving Size: 1 Oreo Easter Chick
- Calories: 150
- Sugar: 10g
- Sodium: 50mg
- Fat: 7g
- Saturated Fat: 3g
- Unsaturated Fat: 4g
- Trans Fat: 0g
- Carbohydrates: 21g
- Fiber: 0g
- Protein: 1g
- Cholesterol: 0mg
Keywords: For added creativity, experiment with different colors of candy melts or toppings like sprinkles. Ensure you work quickly after dipping the Oreos so that the candy coating doesn't set before adding decorations.