
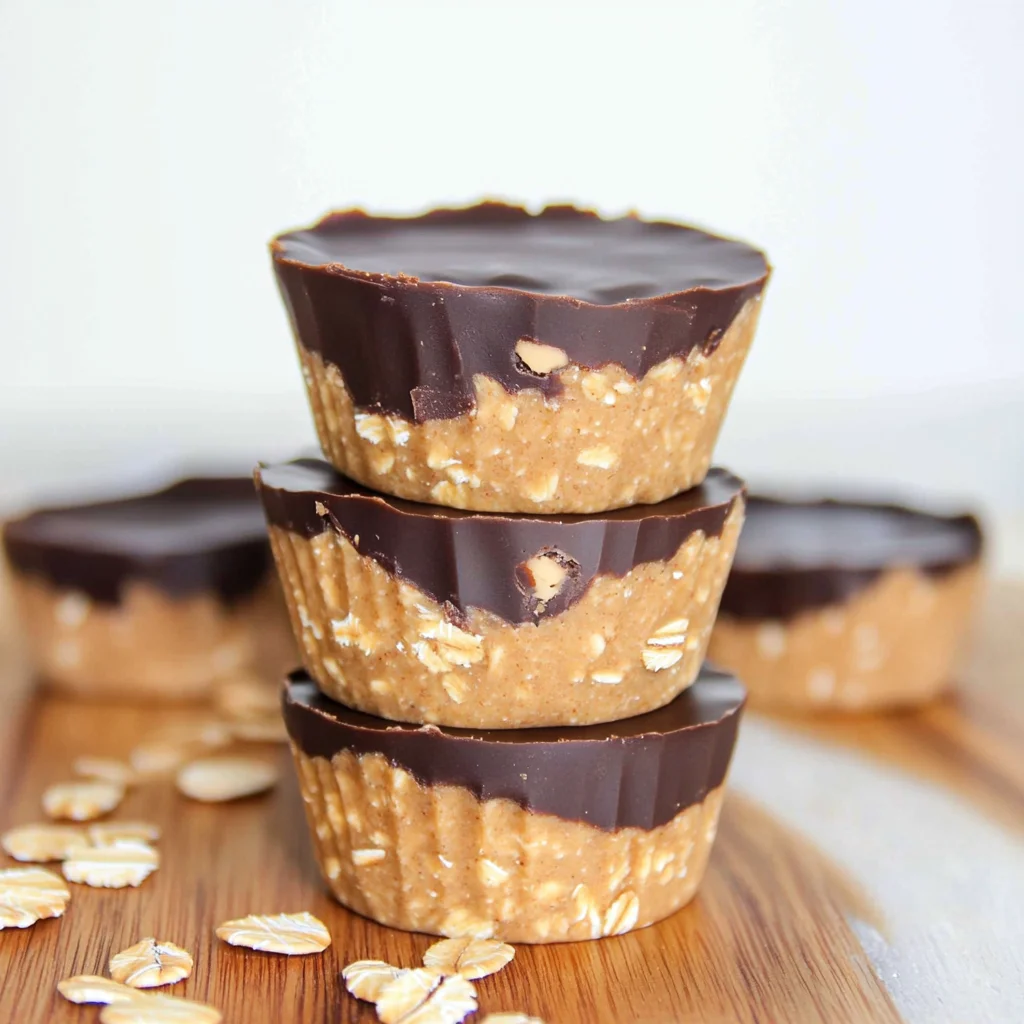
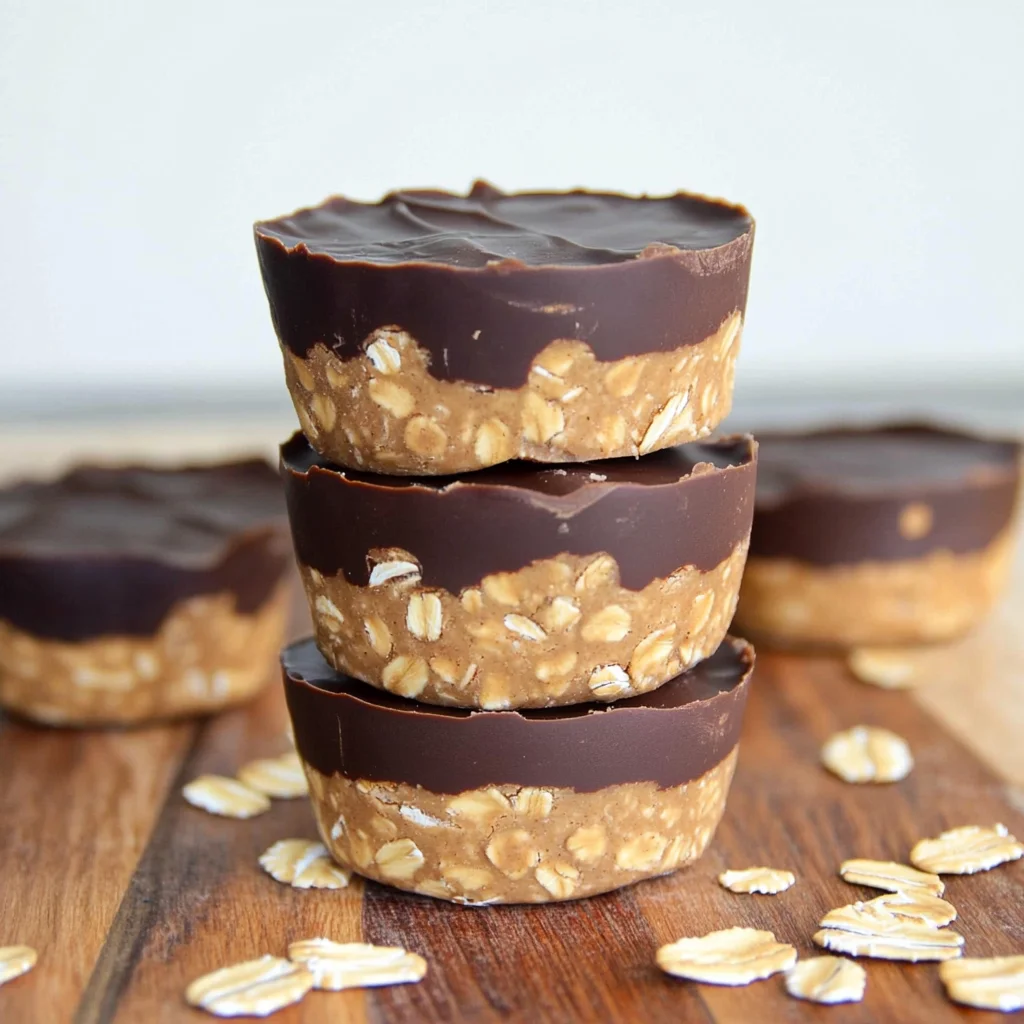
No Bake Peanut Butter Oat Cups are the perfect treat for any occasion. These delicious cups combine creamy peanut butter and wholesome oats, topped with a rich layer of melted chocolate. Whether you need a quick snack for the kids or an indulgent dessert for a gathering, these cups are both satisfying and nutritious. They’re easy to make, require no baking, and are sure to please everyone in your family.
Why You’ll Love This Recipe
- Quick and Easy: With just 10 minutes of prep time, you’ll have a delightful treat ready to chill.
- Nutritious Ingredients: Made with peanut butter, oats, and maple syrup, these cups offer a healthier alternative to traditional desserts.
- Versatile Flavor Combinations: You can customize them by adding ingredients like nuts or dried fruits.
- Kid-Friendly: Children love the sweet chocolate topping combined with the creamy oat base.
- No Baking Required: Enjoy this simple recipe without turning on the oven—perfect for hot days!
Tools and Preparation
Gathering the right tools will make your baking experience smoother. Here’s what you’ll need to create your No Bake Peanut Butter Oat Cups.
Essential Tools and Equipment
- Muffin pan or silicone muffin pan
- Microwave-safe bowl
- Mixing spoon
- Food processor (if making oat flour)
- Airtight container
Importance of Each Tool
- Muffin pan or silicone muffin pan: Ensures easy portioning and removal of your cups once they are set.
- Microwave-safe bowl: Allows for quick melting of ingredients like peanut butter and chocolate without any fuss.
- Food processor: Perfect for transforming rolled oats into fine oat flour if you don’t have store-bought oat flour on hand.
Ingredients
A creamy peanut butter oat layer topped with melted chocolate makes this tasty treat irresistible.
For the Base
- 1.5 cups peanut butter
- 1.5 cups oat flour (Rolled oats processed finely in a food processor)
- 1/4 cup maple syrup
For the Topping
- 1 cup chocolate chips
- 1 tsp coconut oil (optional)

How to Make No Bake Peanut Butter Oat Cups
Step 1: Combine Peanut Butter and Maple Syrup
Add your peanut butter and maple syrup to a medium-sized microwave-safe bowl. Microwave for 40-60 seconds until softened. Stir thoroughly until fully combined.
Step 2: Mix in Oat Flour
Slowly add the oat flour, mixing well until fully incorporated. The mixture should be thick but moldable. If it seems too dry, add more maple syrup or peanut butter gradually.
Step 3: Prepare Your Muffin Pan
Line a muffin pan with cupcake liners or use a silicone muffin pan for easy removal. This step is crucial as it helps to pop out the cups effortlessly once set.
Step 4: Fill Muffin Pan
Scoop the peanut butter oat mixture evenly into each muffin hole. Press down firmly using your fingers to ensure they’re packed well.
Step 5: Melt Chocolate Topping
In another microwave-safe bowl, combine chocolate chips and coconut oil. Heat in 30-second increments until melted, stirring between sessions until smooth.
Step 6: Add Chocolate Layer
Pour a layer of melted chocolate over each filled muffin hole. Use the back of a spoon to smooth out the top. Optionally, sprinkle flaky salt or mini chocolate chips before it hardens.
Step 7: Chill Until Set
Refrigerate your cups for about 2-3 hours until completely set. Once firm, carefully remove them from the muffin pan or liners and store them in an airtight container.
Enjoy your delicious No Bake Peanut Butter Oat Cups as snacks or desserts!
How to Serve No Bake Peanut Butter Oat Cups
No Bake Peanut Butter Oat Cups are a versatile treat that can be enjoyed in various ways. Whether you’re hosting a gathering or looking for a quick snack, these cups can fit the occasion perfectly.
For a Quick Snack
- Straight from the Fridge: Enjoy them chilled for a refreshing treat, ideal for hot days.
- With Fresh Fruit: Pair with slices of banana or strawberries for added flavor and nutrients.
As a Dessert
- Topped with Whipped Cream: Add a dollop of whipped cream on top for an indulgent touch.
- Drizzled with Honey: A light drizzle of honey enhances the sweetness and adds a lovely shine.
For Kids’ Lunchboxes
- Wrapped Individually: Perfectly portioned for kids, wrap each cup in parchment paper for easy grab-and-go options.
- In a Snack Mix: Combine crushed cups with nuts and dried fruit for a homemade trail mix.
How to Perfect No Bake Peanut Butter Oat Cups
Creating the perfect No Bake Peanut Butter Oat Cups requires attention to detail. Here are some tips to ensure your treats turn out just right.
- Use Creamy Peanut Butter: Opting for creamy peanut butter ensures easier mixing and smoother texture.
- Adjust Sweetness: Taste the mixture before setting; add more maple syrup if you prefer it sweeter.
- Consider Texture: If the mixture seems too dry, add in more peanut butter or maple syrup gradually to achieve the desired consistency.
- Chill Properly: Allow enough time in the refrigerator to set (2-3 hours) so they hold their shape well when served.
Best Side Dishes for No Bake Peanut Butter Oat Cups
Pairing No Bake Peanut Butter Oat Cups with complementary sides can enhance your snacking experience. Here are some great options:
- Fruit Salad: A mix of seasonal fruits provides freshness and balances the richness of the oat cups.
- Yogurt Parfait: Layer yogurt with granola and berries to create a delicious contrast in textures.
- Veggie Sticks with Hummus: Adding crunchy veggies like carrots or celery with hummus offers a healthy crunch alongside your sweet treat.
- Nut Mix: A handful of mixed nuts adds protein and crunch, making it a satisfying snack combo.
- Smoothie Bowl: A thick smoothie topped with granola complements the peanut butter flavor while adding nutrition.
- Rice Cakes: Lightly salted rice cakes provide an airy crunch that pairs nicely with creamy oat cups.
Common Mistakes to Avoid
Making No Bake Peanut Butter Oat Cups can be simple, but there are common pitfalls to watch for. Here are some mistakes to avoid:
- Using the wrong type of peanut butter: Opt for natural peanut butter without added sugars or oils. This ensures a creamy texture and healthier treat.
- Not measuring oat flour properly: If you pack the oat flour too tightly, your mixture can become too dry. Use a spoon to scoop it into your measuring cup for accuracy.
- Skipping the refrigeration step: Failing to refrigerate these cups can result in a mushy texture. Give them enough time to set properly for the best results.
- Overheating chocolate: Melting chocolate too quickly can cause it to seize. Heat it in short increments and stir frequently for a smooth finish.
- Neglecting to line the muffin pan: Not using liners makes it hard to remove the cups later. Always line your pan or use silicone molds for easy removal.
Storage & Reheating Instructions
Refrigerator Storage
- Store the No Bake Peanut Butter Oat Cups in an airtight container.
- Keep them in the refrigerator for up to 5 days for optimal freshness.
Freezing No Bake Peanut Butter Oat Cups
- Place the cups in a single layer on a baking sheet until frozen solid.
- Once frozen, transfer them to an airtight container or freezer bag. They can last up to 3 months in the freezer.
Reheating No Bake Peanut Butter Oat Cups
- Oven: Preheat your oven to 350°F (175°C). Place the cups on a baking sheet and heat for about 5-7 minutes.
- Microwave: Heat one cup at a time on low power for 10-15 seconds until slightly warm.
- Stovetop: For gentle warming, place them in a covered skillet over low heat for a few minutes.
Frequently Asked Questions
Can I customize my No Bake Peanut Butter Oat Cups?
Yes! You can add ingredients like chopped nuts, dried fruits, or seeds for extra flavor and nutrition.
How do I make these cups vegan?
To keep your No Bake Peanut Butter Oat Cups vegan, use maple syrup and dairy-free chocolate chips.
What if my mixture is too dry?
If your mixture seems dry when mixing, gradually add more maple syrup or peanut butter until you reach a thick but moldable consistency.
Can I use other nut butters?
Absolutely! Almond butter or cashew butter work well as alternatives if you prefer different flavors.
How long do these treats last?
When stored properly in the refrigerator, they will stay fresh for about 5 days.
Final Thoughts
These No Bake Peanut Butter Oat Cups are not only delicious but also versatile and easy to make. With simple ingredients, they create a delightful treat that satisfies any sweet tooth. Feel free to customize with your favorite add-ins like nuts or dried fruit. Give this recipe a try; it’s sure to become a family favorite!
No Bake Peanut Butter Oat Cups
- Total Time: 10 minutes
- Yield: Approximately 12 servings 1x
Description
No Bake Peanut Butter Oat Cups are a deliciously satisfying treat that combines the rich flavors of creamy peanut butter, wholesome oats, and decadent chocolate. Perfect for any occasion, these delightful cups are not only indulgent but also nutritious, making them an ideal snack for kids or a sweet ending to a family gathering.
Ingredients
- 1.5 cups peanut butter
- 1.5 cups oat flour (finely processed rolled oats)
- 1/4 cup maple syrup
- 1 cup chocolate chips
- 1 tsp coconut oil (optional)
Instructions
- In a microwave-safe bowl, combine peanut butter and maple syrup. Microwave for 40-60 seconds until softened and stir well.
- Gradually mix in oat flour until fully incorporated; the mixture should be thick yet moldable.
- Line a muffin pan with liners or use a silicone pan for easy removal, then fill each muffin hole with the mixture and press down firmly.
- In another bowl, melt chocolate chips and coconut oil together in the microwave until smooth, stirring frequently.
- Pour melted chocolate over each filled muffin hole and smooth the tops if desired.
- Chill in the refrigerator for 2-3 hours until set before removing from the pan.
- Prep Time: 10 minutes
- Cook Time: 0 minutes
- Category: Dessert
- Method: No Baking
- Cuisine: American
Nutrition
- Serving Size: 1 serving
- Calories: 180
- Sugar: 9g
- Sodium: 80mg
- Fat: 12g
- Saturated Fat: 3g
- Unsaturated Fat: 8g
- Trans Fat: 0g
- Carbohydrates: 16g
- Fiber: 2g
- Protein: 6g
- Cholesterol: 0mg
Keywords: For an extra flavor boost, consider adding chopped nuts or dried fruits into the base mixture. Use creamy peanut butter for better consistency and ease of mixing. Be patient during refrigeration; allowing ample time ensures perfect texture when serving.