
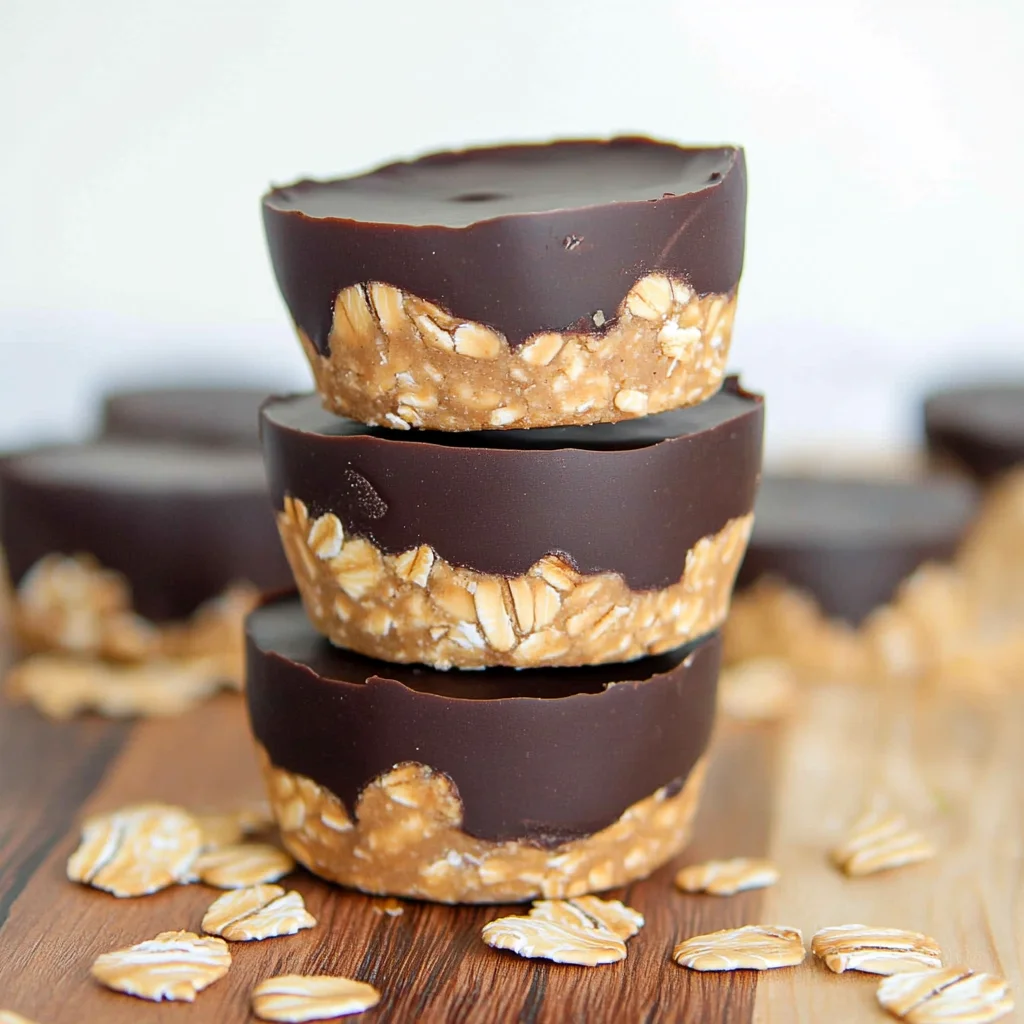
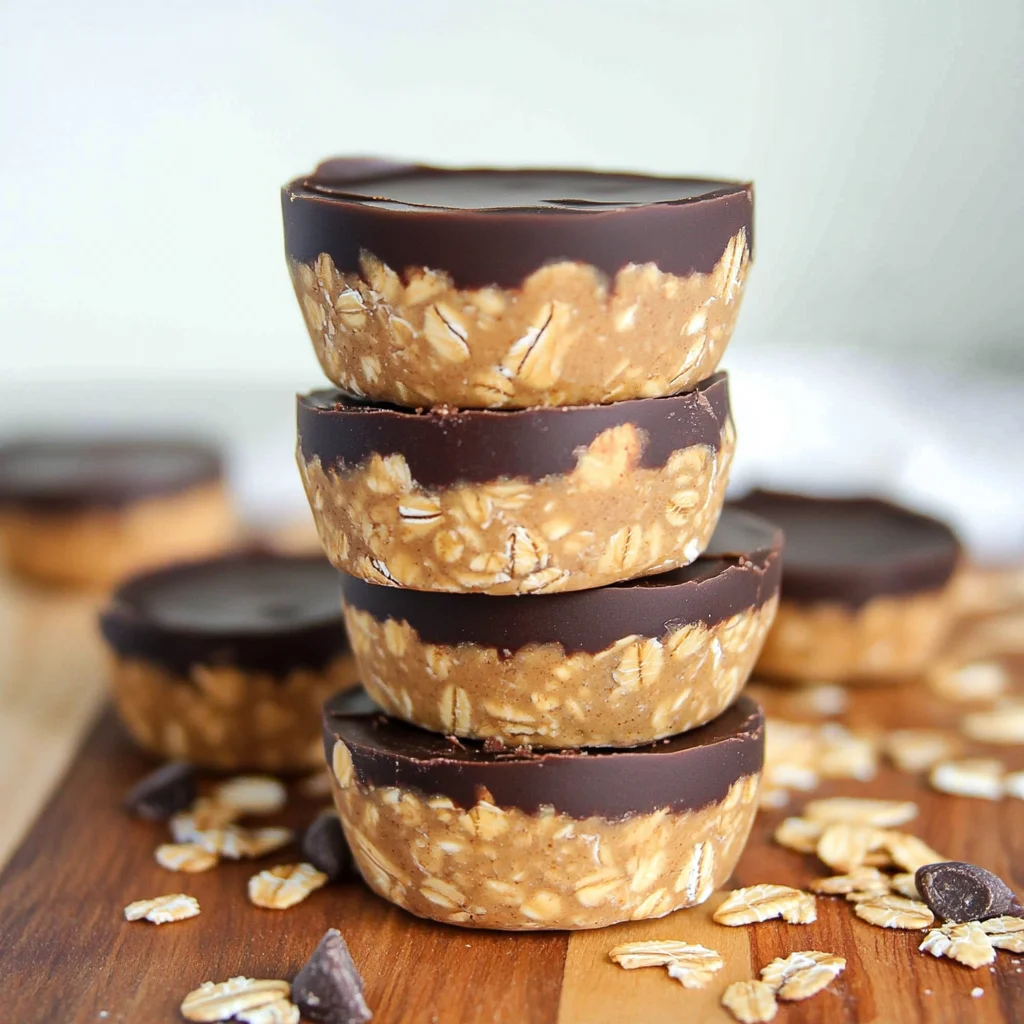
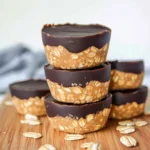
A No Bake Peanut Butter Oat Cups recipe is the perfect solution for a quick, healthy treat that everyone will enjoy. These delightful cups combine creamy peanut butter with a crunchy oat base, topped off with rich melted chocolate. They are not only delicious but also versatile enough for any occasion—be it a snack during movie night, a sweet addition to lunch boxes, or a guilt-free dessert. Plus, they come together in just 10 minutes with no baking required!
Why You’ll Love This Recipe
- Quick and Easy: This recipe takes only 10 minutes to prepare, making it perfect for busy days.
- Healthy Ingredients: Packed with wholesome oats and natural sweeteners, these cups are a healthier option for snacking.
- Versatile Treat: Enjoy them as a dessert, snack, or even breakfast on the go!
- Family-Friendly: Kids love the combination of peanut butter and chocolate—making it a hit with the whole family.
- Customizable: Feel free to add your favorite mix-ins like nuts or dried fruits for added flavor.
Tools and Preparation
To make your No Bake Peanut Butter Oat Cups, you’ll need some basic kitchen tools. Having the right equipment will make your cooking experience smoother.
Essential Tools and Equipment
- Microwave-safe bowl
- Muffin pan (with liners)
- Mixing spoon or standing mixer
- Small microwave-safe bowl
Importance of Each Tool
- Microwave-safe bowl: Essential for melting ingredients like peanut butter and chocolate quickly.
- Muffin pan: Helps shape the cups perfectly; using liners makes removal easier.
- Mixing spoon or standing mixer: A sturdy tool is needed to blend ingredients effectively.
Ingredients
A creamy peanut butter oat layer topped with melted chocolate to make a tasty peanut butter chocolate treat that your whole family will love.
Ingredients:
– 1.5 cups peanut butter
– 1.5 cups oat flour (Rolled oats processed finely in a food processor)
– 1/4 cup maple syrup
– 1 cup chocolate chips
– 1 tsp coconut oil (optional)
For Garnish
- 2 tablespoons fresh parsley, finely chopped

How to Make No Bake Peanut Butter Oat Cups
Step 1: Melt Peanut Butter and Maple Syrup
Add your peanut butter and maple syrup to a medium-sized microwave-safe bowl and microwave for 40-60 seconds. Stir thoroughly until the mixture is completely combined.
Step 2: Mix in Oat Flour
Next, slowly add the oat flour to the bowl and mix well. It should take some effort to blend! If you have one, transferring the mixture to a standing mixer can make this step easier. The final mixture should be thick yet moldable.
Step 3: Prepare Muffin Pan
Line your muffin pan with cupcake liners or use a silicone muffin pan for easy removal. Note that removing from standard muffin pans without liners may be tricky.
Step 4: Scoop Mixture into Muffin Pan
Scoop the peanut butter oat mixture evenly into each muffin hole. Press down firmly with your fingers to ensure they hold their shape.
Step 5: Melt Chocolate Chips
In a small microwave-safe bowl, add chocolate chips and optional coconut oil. Heat in 30-second increments until fully melted and smooth. Stir between intervals for an even melt.
Step 6: Add Chocolate Layer
Pour a layer of melted chocolate over each muffin hole. Use the back of a spoon to smooth out the top. If desired, sprinkle flaky salt or mini chocolate chips before cooling.
Step 7: Chill and Store
Refrigerate for 2-3 hours until set completely. Carefully remove from the muffin pan or silicone molds. Store in an airtight container in the refrigerator for up to 5 days for best freshness.
How to Serve No Bake Peanut Butter Oat Cups
No Bake Peanut Butter Oat Cups are delicious on their own, but you can enhance the experience with a few serving ideas. These suggestions will help you enjoy this treat in different ways that suit any occasion.
With Fresh Fruit
- Banana Slices: Top your oat cups with fresh banana slices for added sweetness and nutrition.
- Berries: Serve with strawberries or blueberries for a burst of flavor and color.
As a Snack Platter
- Cheese: Pair with soft cheese, like cream cheese or goat cheese, for a balanced sweet and savory snack.
- Nuts: Include a variety of nuts to add crunch and healthy fats alongside your oat cups.
For a Sweet Breakfast
- Yogurt Parfait: Layer crumbled oat cups with yogurt and fruit in a glass for a delightful breakfast treat.
- Oatmeal Bowl: Crumble over warm oatmeal for an extra nutty flavor in your morning bowl.
How to Perfect No Bake Peanut Butter Oat Cups
To ensure your No Bake Peanut Butter Oat Cups turn out perfectly every time, consider these helpful tips.
- Bold Peanut Butter Choice: Use creamy or natural peanut butter for the best texture. This will make mixing easier and provide a smooth finish.
- Bold Measure the Oats: Ensure you measure the oat flour accurately to achieve the right consistency. Too much flour can make them dry.
- Bold Add Sweetness Gradually: Start with less maple syrup, adding more if needed. This helps control the sweetness level.
- Bold Use Quality Chocolate: Opt for high-quality chocolate chips for melting. It elevates the flavor of your treat significantly.
- Bold Refrigerate Properly: Allow enough time in the fridge to set completely. This makes them easier to handle and enhances taste.
- Bold Try Different Toppings: Experiment with toppings like crushed nuts or coconut flakes for added texture and flavor diversity.
Best Side Dishes for No Bake Peanut Butter Oat Cups
Serving side dishes can elevate your No Bake Peanut Butter Oat Cups into a complete meal or snack experience. Here are some great options to consider.
- Fresh Fruit Salad: A mix of seasonal fruits brightens up the plate and adds freshness.
- Greek Yogurt: Creamy yogurt pairs well, offering protein and tanginess that complements the sweetness of the oat cups.
- Trail Mix: A mix of nuts, seeds, and dried fruits adds crunch and energy—perfect for snacking alongside.
- Chocolate Dipped Pretzels: The salty-sweet combination enhances the flavors while providing an extra crunch.
- Granola Bars: Homemade or store-bought granola bars add another layer of flavor while being portable snacks.
- Rice Cakes with Nut Butter: Spread nut butter on rice cakes as a lighter accompaniment that still satisfies cravings.
Common Mistakes to Avoid
Making No Bake Peanut Butter Oat Cups can be fun and easy, but there are some common mistakes that can affect your results.
- Using the wrong peanut butter: Always opt for natural peanut butter without added sugar or oils. This will ensure a smoother texture and better flavor in your oat cups.
- Not measuring oat flour correctly: Use a scale or fluff up your oat flour before scooping. Incorrect measurements can lead to a dry or overly wet mixture.
- Skipping the refrigeration step: Allowing your cups to set in the fridge is crucial for the right texture. Skipping this step may result in a soft and messy treat.
- Overheating chocolate: Heat chocolate chips too long, and they can seize up. Microwave in short bursts, stirring often to maintain a smooth consistency.
- Ignoring optional ingredients: Coconut oil helps chocolate stay shiny and smooth. Don’t skip it if you want that perfect finish on top of your oat cups!
Storage & Reheating Instructions
Refrigerator Storage
- Store No Bake Peanut Butter Oat Cups in an airtight container.
- They will remain fresh for up to 5 days.
- Keep them refrigerated to maintain texture and flavor.
Freezing No Bake Peanut Butter Oat Cups
- Freeze individual cups in a single layer on a baking sheet before transferring to an airtight container.
- They can be frozen for up to 3 months.
- Thaw overnight in the refrigerator before serving.
Reheating No Bake Peanut Butter Oat Cups
- Oven: Preheat to 350°F (175°C) and warm for about 5-10 minutes.
- Microwave: Heat one cup at a time for 10-15 seconds until just warm.
- Stovetop: Place in a small pan over low heat, covering with a lid until warmed through.
Frequently Asked Questions
Can I use almond butter instead of peanut butter?
Yes, almond butter works well as a substitute. It will slightly change the flavor but still create delicious oat cups.
How do I make these No Bake Peanut Butter Oat Cups vegan?
To make them vegan, ensure you use dairy-free chocolate chips and substitute maple syrup with agave syrup if desired.
What can I add to my No Bake Peanut Butter Oat Cups?
Feel free to customize by adding nuts, seeds, or dried fruit into the mixture for added texture and flavor.
How do I store leftovers of No Bake Peanut Butter Oat Cups?
Store them in an airtight container in the refrigerator for up to 5 days or freeze them for longer shelf life.
Final Thoughts
These No Bake Peanut Butter Oat Cups are not only simple to make but also versatile. You can easily customize them with various toppings or mix-ins, making them perfect for any taste preference. Give this recipe a try; your family will love these delicious treats!
No Bake Peanut Butter Oat Cups
- Total Time: 21 minute
- Yield: Makes approximately 12 servings 1x
Description
No Bake Peanut Butter Oat Cups are a deliciously easy treat that combines the creamy goodness of peanut butter with a crunchy oat base, finished off with a delightful layer of melted chocolate. Perfect for any occasion, these cups take just 10 minutes to prepare and require no baking at all! They’re a fantastic option for busy families, as they can be enjoyed as a snack, dessert, or even breakfast on the go. With customizable ingredients, you can create variations that suit everyone’s taste. Indulge guilt-free and satisfy your sweet cravings with these wholesome cups that everyone will love!
Ingredients
- 1.5 cups peanut butter
- 1.5 cups oat flour
- 1/4 cup maple syrup
- 1 cup chocolate chips
- 1 tsp coconut oil (optional)
Instructions
- In a medium microwave-safe bowl, combine peanut butter and maple syrup. Microwave for 40-60 seconds until melted; stir until smooth.
- Gradually mix in oat flour until well combined; the mixture should be thick yet moldable.
- Line a muffin pan with cupcake liners or use a silicone muffin tray for easy removal.
- Scoop the mixture into each muffin hole and press down firmly to shape.
- In a separate small bowl, melt chocolate chips and optional coconut oil in the microwave in 30-second increments until smooth; stir well.
- Pour melted chocolate over each cup and smooth with the back of a spoon if needed.
- Refrigerate for 2-3 hours until set; store in an airtight container in the fridge for up to 5 days.
- Prep Time: 10 minutes
- Cook Time: None
- Category: Dessert
- Method: No Bake
- Cuisine: American
Nutrition
- Serving Size: 1 cup (45g)
- Calories: 191
- Sugar: 6g
- Sodium: 76mg
- Fat: 12g
- Saturated Fat: 2g
- Unsaturated Fat: 8g
- Trans Fat: 0g
- Carbohydrates: 18g
- Fiber: 3g
- Protein: 6g
- Cholesterol: 0mg
Keywords: For added flavor, consider mixing in nuts or dried fruit before chilling. Use high-quality chocolate chips for the best taste. If you prefer different nut butters, almond butter works well as a substitute.