
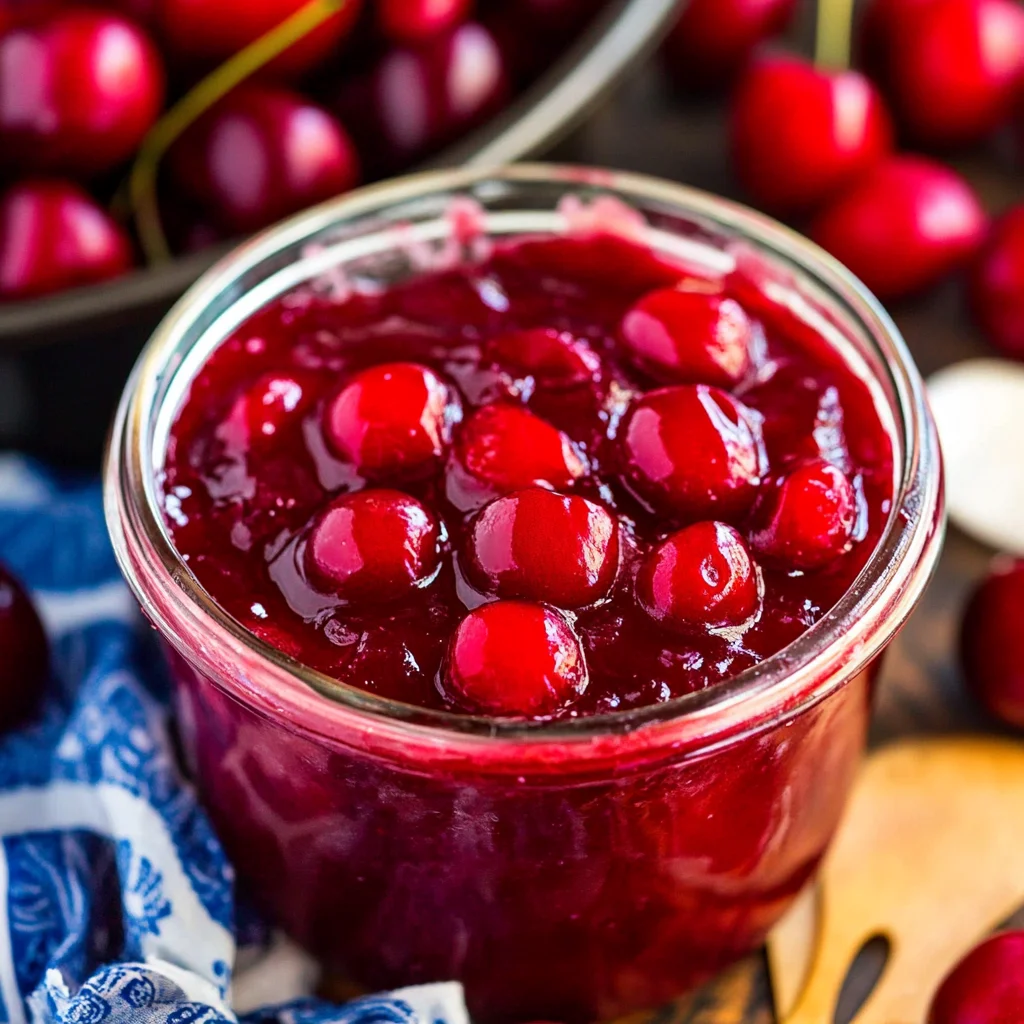
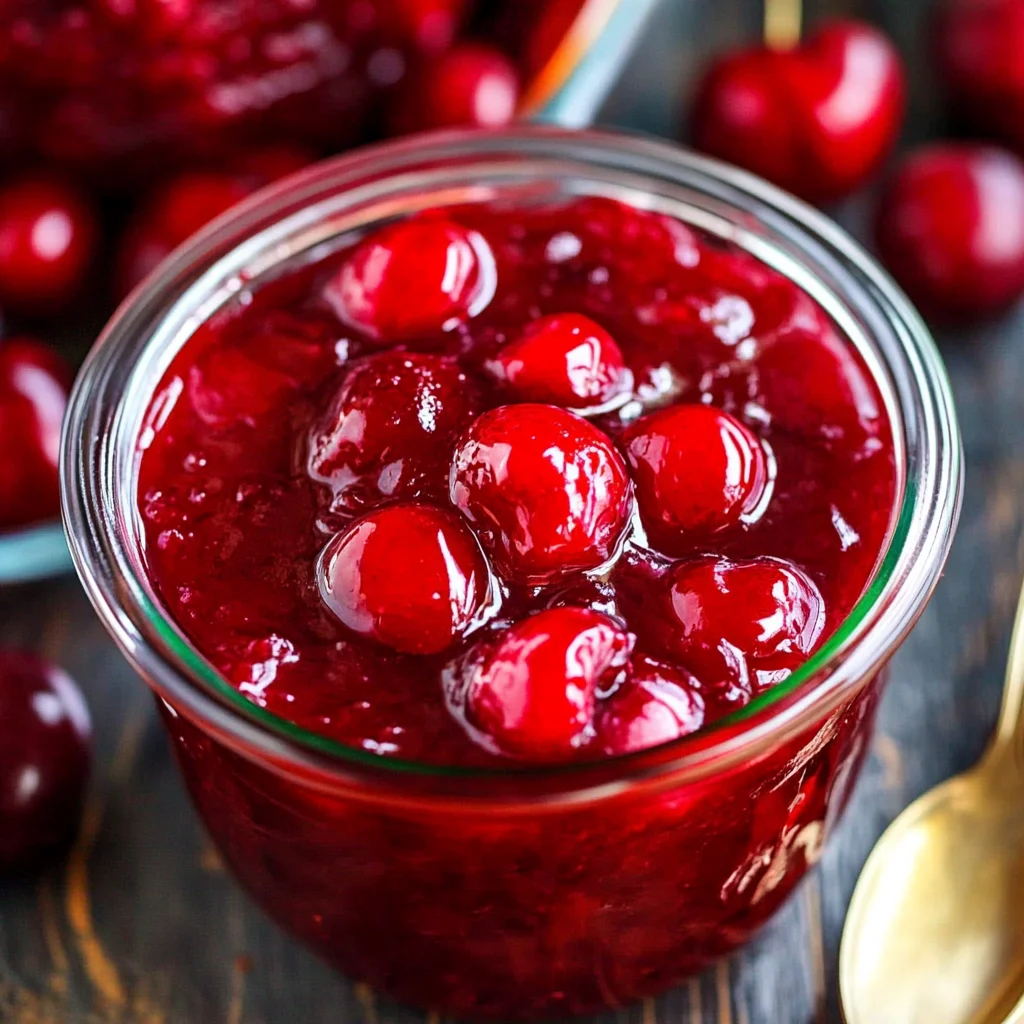
This Cherry Pie Filling Recipe is a delightful way to enjoy fresh cherries year-round. Whether you’re making a classic pie, topping desserts, or simply enjoying it on its own, this filling is the star of the show. With its vibrant flavor and simple preparation, it’s perfect for gatherings or cozy family dinners. Plus, this recipe is gluten-free, making it suitable for various dietary needs!
Why You’ll Love This Recipe
- Easy to Make: With minimal ingredients and straightforward steps, this filling comes together quickly.
- Versatile Use: Perfect for pies, tarts, or as a topping for ice cream and yogurt.
- Fresh Flavor: Using fresh cherries enhances the taste significantly compared to store-bought options.
- Customizable Sweetness: Adjust the sugar level to your preference by using tart or sweet cherries.
- Gluten-Free Option: Great for those watching their gluten intake, ensuring everyone can enjoy it.
Tools and Preparation
Before diving into the recipe, gather your essential tools to streamline the process.
Essential Tools and Equipment
- Medium saucepan
- Mixing bowl
- Spoon
- Measuring cups
Importance of Each Tool
- Medium saucepan: Essential for cooking the cherries evenly while allowing them to release their juices.
- Mixing bowl: Used for preparing the cornstarch slurry and combining ingredients effectively.
- Spoon: A must-have for stirring and ensuring everything blends perfectly.
Ingredients
This easy Cherry Pie Filling can be made with tart or sweet cherries and is perfect for a no bake pie or any cherry dessert. Plus the filling is gluten-free!
For the Cherry Filling
- 4 ½ – 5 cups fresh cherries (about 1¾ pounds) (pitted)
- ¼ cup water
- ⅔ cup (133g) sugar
- ¼ cup (30g) cornstarch
- 1 tablespoon (15ml) lemon juice (see note)

How to Make Cherry Pie Filling Recipe
Step 1: Prepare the Cherries
Begin by pitting your cherries. Place them in a medium saucepan along with the water. Cover and set over medium-low heat. Allow it to come to a boil, cooking until the cherries soften and release their juices—this should take about 10-15 minutes.
Step 2: Make Cornstarch Slurry
In a small bowl, create a cornstarch slurry by mixing ¼ cup of COLD water with the cornstarch. Stir well with a spoon until fully combined.
Step 3: Adjust Sweetness
If you find that your cherry mixture is too sweet for your taste, add in the lemon juice. This will help balance out the flavors beautifully.
Step 4: Combine Ingredients
Next, stir in the sugar into the softened cherries. Once combined, pour in your prepared cornstarch slurry. Stir continuously as this mixture will thicken quickly.
Step 5: Cool and Store
Remove the cherry filling from heat. Transfer it into a bowl or large jar. Let it cool to room temperature before placing it in the refrigerator to chill until you are ready to use it. Alternatively, you can freeze it; this filling will last up to four days in the fridge!
How to Serve Cherry Pie Filling Recipe
Cherry pie filling is a versatile treat that can complement many desserts and dishes. Whether you’re looking to enhance a classic dessert or create something new, there are plenty of delicious ways to serve this cherry delight.
On Top of Ice Cream
- Sundae Delight: Spoon warm cherry pie filling over vanilla ice cream for a classic sundae.
- Cherry Float: Mix with soda water for a refreshing cherry float.
In Pancakes or Waffles
- Breakfast Treat: Add cherry pie filling to your morning pancakes or waffles for a fruity twist.
- Stuffed Crepes: Use as a filling in crepes for a tasty breakfast or dessert option.
With Yogurt
- Healthy Parfait: Layer with yogurt and granola for a nutritious parfait.
- Smoothie Bowl Topping: Use it as a topping for smoothie bowls to add flavor and color.
In Desserts
- Cherry Cheesecake: Spread the filling on top of cheesecake for an easy dessert upgrade.
- Pies and Tarts: Use the filling in various pie crusts or tarts to make quick desserts.
How to Perfect Cherry Pie Filling Recipe
Creating the perfect cherry pie filling requires attention to detail. Here are some tips to help you achieve the best results:
- Choose Fresh Cherries: Using fresh, ripe cherries enhances the flavor and texture of your filling.
- Adjust Sweetness: Taste before adding all the sugar; tart cherries may need less sweetening.
- Cornstarch Consistency: Ensure your cornstarch slurry is smooth to avoid lumps in your filling.
- Chill Before Serving: Allowing the filling to cool completely helps thicken it further and enhances flavors.
- Experiment with Spices: Consider adding cinnamon or almond extract for an extra depth of flavor.
Best Side Dishes for Cherry Pie Filling Recipe
Cherry pie filling pairs well with various side dishes that can balance its sweetness. Here are some delightful options:
- Vanilla Ice Cream: A classic pairing that complements the tartness of cherries perfectly.
- Pound Cake: Serve slices of moist pound cake topped with cherry pie filling for an elegant dessert.
- Shortcake Biscuits: Light and fluffy biscuits enhance the fruity flavor when paired with cherries.
- Cheesecake Bites: Small cheesecake squares topped with cherry filling make for bite-sized delights.
- Oatmeal Cookies: Use as a topping on oatmeal cookies for added sweetness and texture.
- Rice Pudding: The creamy rice pudding serves as a lovely base for warm cherry pie filling.
- Chocolate Cake: A rich chocolate cake perfectly contrasts the bright flavors of the cherries.
Common Mistakes to Avoid
Making the perfect Cherry Pie Filling requires attention to detail. Here are some common mistakes to watch out for:
- Using unripe cherries: Unripe cherries can lead to a less flavorful filling. Always choose ripe, fresh cherries for the best taste.
- Not pitting the cherries properly: Forgetting to pit the cherries will result in a messy filling. Take your time to pit them before cooking.
- Skipping the cornstarch slurry: Not using a cornstarch slurry can cause your filling to be runny. Always mix cornstarch with cold water before adding it to the mixture.
- Overcooking the cherries: Cooking cherries for too long can make them mushy. Monitor them closely and cook just until they start to soften.
- Ignoring the lemon juice: Skipping lemon juice may make your filling too sweet. A splash of lemon juice balances sweetness and enhances flavor.
Storage & Reheating Instructions
Refrigerator Storage
- Store in an airtight container for up to 4 days.
- Allow the filling to cool completely before sealing it in a container.
- Label the container with the date for easy tracking.
Freezing Cherry Pie Filling Recipe
- Use freezer-safe containers or bags for storage.
- The filling can be frozen for up to 6 months.
- Leave some space in containers as liquids expand when frozen.
Reheating Cherry Pie Filling Recipe
- Oven: Preheat oven to 350°F (175°C). Place filling in an oven-safe dish and heat until warm, about 15 minutes.
- Microwave: Transfer filling to a microwave-safe bowl. Heat on high for 1-2 minutes, stirring halfway through.
- Stovetop: Pour filling into a saucepan over low heat. Stir continuously until heated through, about 5 minutes.
Frequently Asked Questions
What are some variations of this Cherry Pie Filling Recipe?
You can use different types of fruit like blueberries or raspberries. Mixing fruits creates unique flavors and textures.
Can I use frozen cherries for this recipe?
Yes! Frozen cherries work well but may require slight adjustments in cooking time since they release more liquid.
How do I thicken my Cherry Pie Filling if it’s too runny?
If your filling is too runny, try adding more cornstarch mixed with cold water. Cook for a few more minutes until thickened.
Is this Cherry Pie Filling Recipe gluten-free?
Absolutely! This recipe is naturally gluten-free, making it suitable for those with gluten sensitivities.
Can I use this recipe for canning?
Yes! Follow proper canning procedures if you want to preserve your Cherry Pie Filling long-term.
Final Thoughts
This Cherry Pie Filling Recipe is not only easy but also incredibly versatile. You can enjoy it fresh or frozen, and customize it with different fruits or spices. Whether you’re preparing a pie or simply using it as a topping, this delicious filling will elevate any dessert. Give it a try and savor the delightful flavors!
Cherry Pie Filling
- Total Time: 30 minutes
- Yield: Approximately 4 servings (2 cups total) 1x
Description
Indulge in the sweet and tangy delight of homemade Cherry Pie Filling. This easy recipe transforms fresh cherries into a luscious filling that’s perfect for pies, tarts, ice cream, pancakes, and more. With its vibrant color and rich flavor, this gluten-free cherry filling is a versatile addition to your dessert repertoire. Whether you’re hosting a family gathering or enjoying a cozy night in, this delightful treat will impress everyone at the table. Plus, it’s customizable—adjust the sweetness to match your taste by using tart or sweet cherries. Enjoy the taste of summer all year round with this simple yet satisfying recipe!
Ingredients
- 4 ½ – 5 cups fresh cherries (pitted)
- ¼ cup water
- ⅔ cup sugar
- ¼ cup cornstarch
- 1 tablespoon lemon juice
Instructions
- Pit the cherries and place them in a medium saucepan with water over medium-low heat. Cover and cook for about 10-15 minutes until softened and juicy.
- In a small bowl, mix cornstarch with ¼ cup cold water to create a slurry.
- Stir sugar into the cherry mixture; then add the cornstarch slurry while stirring continuously until the mixture thickens.
- Remove from heat and let cool before storing in an airtight container.
- Prep Time: 15 minutes
- Cook Time: 15 minutes
- Category: Dessert
- Method: Cooking
- Cuisine: American
Nutrition
- Serving Size: ½ cup (120g)
- Calories: 162
- Sugar: 31g
- Sodium: 5mg
- Fat: 0g
- Saturated Fat: 0g
- Unsaturated Fat: 0g
- Trans Fat: 0g
- Carbohydrates: 39g
- Fiber: 2g
- Protein: <1g
- Cholesterol: 0mg
Keywords: For varied flavors, you can experiment with spices like cinnamon or almond extract. Use frozen cherries if fresh ones are unavailable; adjust cooking time as needed. This filling can be canned for long-term storage following proper canning procedures.