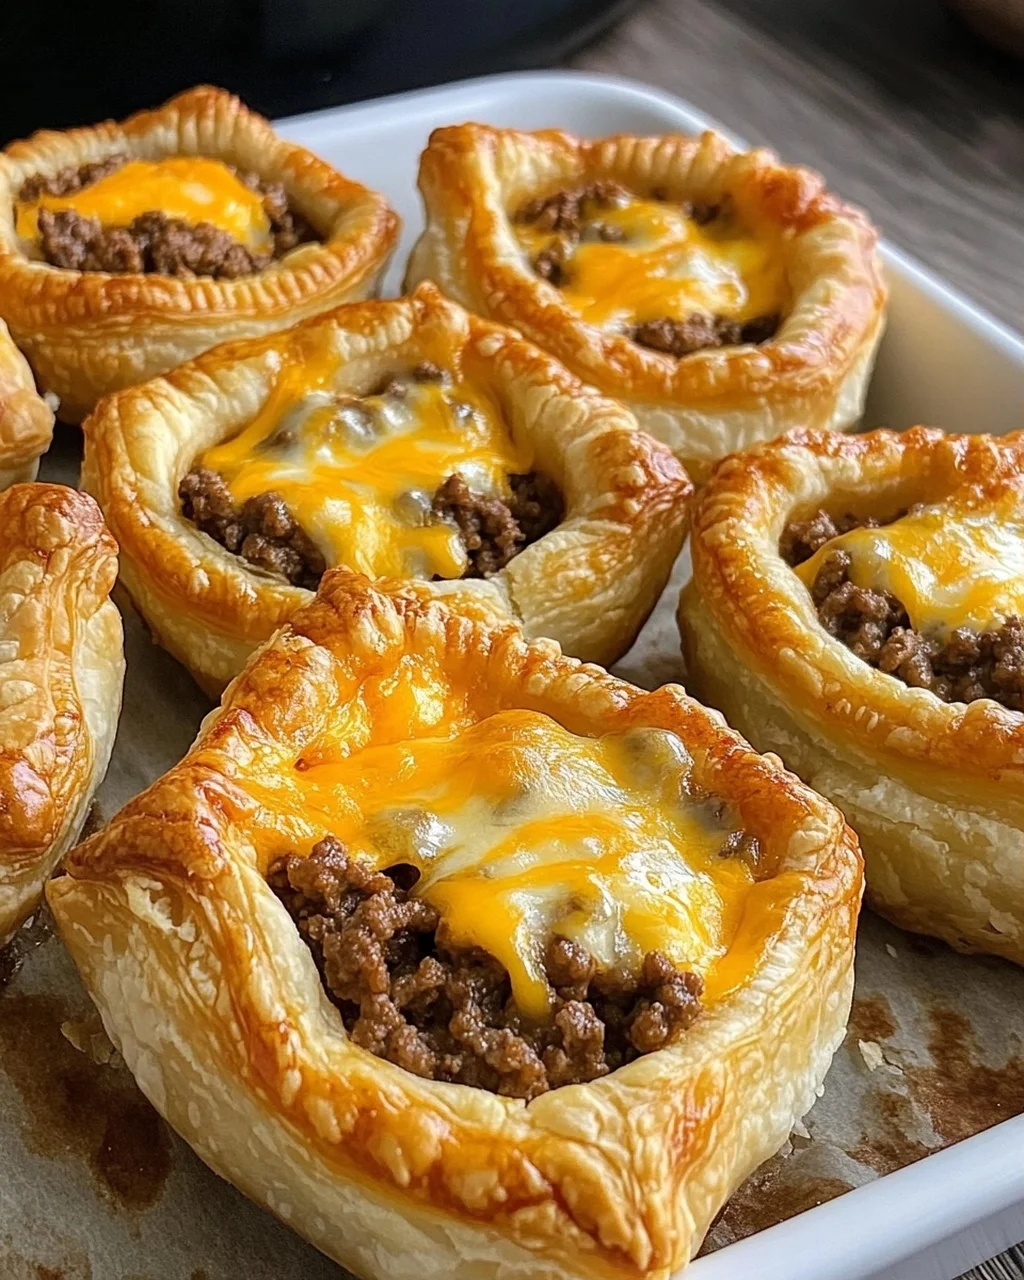
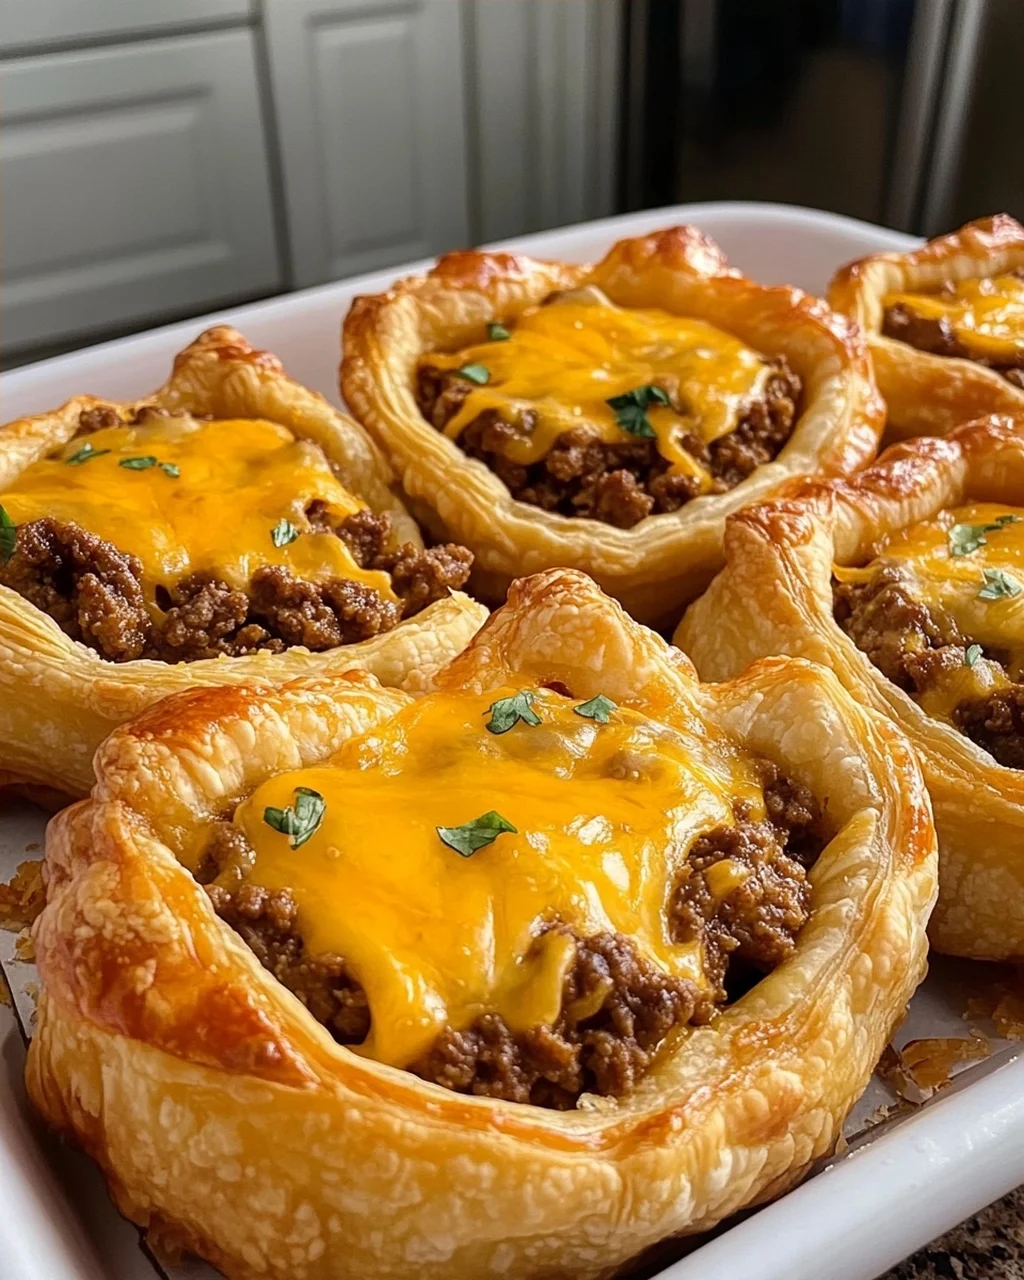
If you’re looking for a fun and delicious way to spice up your weeknight dinners, then these Cheesy Beef Taco Puff Pastry Cups are just what you need! They’re not only super easy to make, but they also pack a flavorful punch that will have everyone coming back for seconds. Imagine flaky pastry cups filled with savory seasoned ground beef and melted cheddar cheese—what’s not to love? This recipe is perfect for busy evenings or family gatherings, making it a go-to favorite in my kitchen.
Each bite of these delightful cups reminds me of taco night with friends and family. They are the ultimate handheld treat that can double as an appetizer or a main dish. Whether you’re hosting a party or simply craving something comforting, these Cheesy Beef Taco Puff Pastry Cups will surely impress!
Why You’ll Love This Recipe
- Quick Preparation: With just 15 minutes of prep time, you can whip up these tasty cups in no time.
- Family-Friendly Flavor: Everyone loves tacos! These cups bring the familiar taste of tacos in a fun new form.
- Make-Ahead Convenience: You can prepare them in advance and freeze before baking for an easy meal option later on.
- Versatile Serving Options: Perfect as a dinner option or an appetizer for parties; they fit any occasion!

Ingredients You’ll Need
Making these Cheesy Beef Taco Puff Pastry Cups is simple, thanks to a few wholesome ingredients you probably already have on hand. Let’s gather everything we need for this delightful recipe!
For the Filling
- 1 sheet frozen puff pastry (thawed)
- 1 pound ground beef (80/20)
- 1 packet taco seasoning (1.25 oz)
- 1/2 cup water
- 1 cup shredded cheddar cheese (divided)
For the Egg Wash
- 1 large egg (beaten with 1 tbsp water)
Optional Garnish
- Diced tomatoes
- Black olives
- Cilantro
- Sour cream
Variations
One of the best things about this recipe is its flexibility! Feel free to get creative with your fillings and toppings. Here are some fun variations to try:
- Swap the protein: Use ground turkey or chicken instead of beef for a lighter option.
- Add veggies: Mix in some chopped bell peppers or onions to the beef mixture for extra flavor and nutrition.
- Cheese switch: Try using pepper jack cheese for a spicy kick!
- Make it vegetarian: Substitute the beef with black beans or lentils, seasoned similarly for a hearty veggie version.
How to Make Cheesy Beef Taco Puff Pastry Cups
Step 1: Preheat Your Oven
Start by preheating your oven to 400°F. This step is crucial because it ensures that your pastry cups will bake evenly and become perfectly golden brown.
Step 2: Prepare the Pastry
Cut your thawed puff pastry into 12 squares. Gently press each square into a greased muffin tin. This creates little pockets that will hold all that delicious filling later on!
Step 3: Cook the Beef
In a skillet over medium heat, brown the ground beef until fully cooked. Drain any excess fat, then add your taco seasoning and water. Let it simmer until thickened—this step allows all those flavors to meld beautifully together.
Step 4: Add Cheese to the Mixture
Mix 3/4 cup of shredded cheddar cheese into the beef mixture. Spoon this cheesy goodness evenly into each pastry cup. The cheese adds an irresistible creaminess that ties everything together.
Step 5: Bake Until Golden
Brush the edges of each cup with your egg wash—a simple mix of beaten egg and water—to help them achieve a lovely golden color when baked. Place them in the oven and bake for about 15-18 minutes until they puff up and turn golden brown.
Step 6: Cool and Garnish
Once done, let them cool in the pan for about five minutes before removing them gently. Top with any remaining cheese and your favorite garnishes like diced tomatoes or sour cream before serving!
These Cheesy Beef Taco Puff Pastry Cups are sure to become a staple in your home just like they have in mine. Enjoy every bite!
Pro Tips for Making Cheesy Beef Taco Puff Pastry Cups
Creating the perfect Cheesy Beef Taco Puff Pastry Cups is easier than you might think! With a few handy tips, you’ll impress your family and friends with these delightful treats.
Use Cold Puff Pastry: Keeping your puff pastry cold until you’re ready to bake ensures it puffs up beautifully in the oven, leading to a flaky texture that everyone loves.
Don’t Overfill: While it’s tempting to pile on the beef mixture, overfilling can lead to spillage during baking. Aim for a generous but manageable amount in each cup for the best results.
Experiment with Seasonings: Feel free to add your favorite spices or fresh herbs to the beef mixture. A little cumin or chili powder can add an extra kick that elevates the flavor profile.
Brush with Egg Wash: This simple step not only gives your pastry a beautiful golden color but also adds a slight sheen that makes them visually appealing when served.
Serve Warm: These cups are best enjoyed fresh out of the oven. If you need to make them ahead, reheat them briefly in the oven to maintain their crispiness.
How to Serve Cheesy Beef Taco Puff Pastry Cups
Presenting your Cheesy Beef Taco Puff Pastry Cups can be just as fun as making them! Here are some ideas on how to make serving this dish an exciting experience for your guests.
Garnishes
- Diced Tomatoes: Fresh tomatoes add a burst of color and freshness that complements the savory flavors of the cups perfectly.
- Black Olives: Sliced black olives provide an extra layer of flavor and a nice contrast in texture.
- Cilantro: A sprinkle of chopped cilantro adds a fresh, herbal note that brightens up each bite.
Side Dishes
- Mexican Street Corn Salad: This vibrant salad combines sweet corn, creamy dressing, lime juice, and spices for a refreshing side that balances the richness of the taco cups.
- Guacamole: Creamy guacamole is always a hit! Its smooth texture and zesty flavor pair beautifully with the crispy pastry and savory beef.
- Refried Beans: A side of refried beans adds protein and creaminess, making for a hearty meal that satisfies.
- Chips and Salsa: Simple and classic, tortilla chips with salsa offer crunch and zest, making them a perfect companion to your cheesy taco cups.
Enjoy serving these delightful Cheesy Beef Taco Puff Pastry Cups at your next gathering or family dinner—they’re sure to be a hit!
Make Ahead and Storage
These Cheesy Beef Taco Puff Pastry Cups are perfect for meal prep, making them a fantastic option for busy weeknights or gatherings. You can easily whip up a batch in advance and enjoy them fresh later on!
Storing Leftovers
- Allow the taco puff pastry cups to cool completely before storing.
- Place them in an airtight container in the fridge.
- They can be stored for up to 3 days.
Freezing
- Prepare the taco puff pastry cups but do not bake them.
- Arrange the unbaked cups on a baking sheet and freeze until solid.
- Once frozen, transfer them to a freezer-safe bag or container.
- They can be frozen for up to 2 months.
Reheating
- Preheat your oven to 350°F.
- Place the puff pastry cups on a baking sheet lined with parchment paper.
- Bake for about 10-15 minutes or until heated through and the pastry is crispy.
FAQs
Have questions about making these delicious Cheesy Beef Taco Puff Pastry Cups? You’re not alone! Here are some common inquiries:
Can I use ground turkey instead of beef in Cheesy Beef Taco Puff Pastry Cups?
Yes! Ground turkey is a great alternative if you’re looking for a leaner option. Just cook it the same way you would with ground beef, adding taco seasoning as instructed.
How can I make Cheesy Beef Taco Puff Pastry Cups vegetarian?
To make these cups vegetarian, replace the ground beef with a mix of sautéed vegetables like bell peppers, zucchini, and black beans. You can still add cheese for that delicious cheesy flavor!
What other toppings work well with Cheesy Beef Taco Puff Pastry Cups?
You can get creative with toppings! Consider adding diced avocado, jalapeños, or even corn salsa. Fresh cilantro or a dollop of sour cream also makes for great garnishes.
Can I prepare the filling ahead of time?
Absolutely! You can make the beef mixture ahead of time and store it in the fridge. Just fill your pastry cups when you’re ready to bake!
Final Thoughts
I hope you find joy in creating these Cheesy Beef Taco Puff Pastry Cups! They’re not just delicious; they’re also versatile enough to suit any occasion—dinner parties, casual family meals, or even game day snacks. Enjoy every bite and feel free to personalize them with your favorite toppings. Happy cooking!
Cheesy Beef Taco Puff Pastry Cups
- Total Time: 35 minutes
- Yield: 12 servings 1x
Description
These Cheesy Beef Taco Puff Pastry Cups combine savory seasoned ground beef and melted cheddar in flaky, golden pastry shells for a quick, handheld dinner or appetizer.
Ingredients
- 1 sheet frozen puff pastry (thawed)
- 1 pound ground beef (80/20)
- 1 packet taco seasoning (1.25 oz)
- 1/2 cup water
- 1 cup shredded cheddar cheese (divided)
- 1 large egg (beaten with 1 tbsp water)
- optional garnish (diced tomatoes, black olives, cilantro, sour cream)
Instructions
- Preheat oven to 400°F. Cut thawed puff pastry into 12 squares and press into a greased muffin tin.
- Brown ground beef in a skillet, drain excess fat, add taco seasoning and water, and simmer until thickened.
- Mix 3/4 cup cheese into the beef mixture and spoon evenly into the pastry cups.
- Brush edges with egg wash and bake for 15-18 minutes until golden brown and puffed.
- Cool in pan for 5 minutes, then remove and top with remaining cheese.
- Prep Time: 15 minutes
- Cook Time: 20 minutes
- Category: appetizer, dinner
- Cuisine: Mexican
Nutrition
- Serving Size: 1
Keywords: Store leftovers in the fridge for up to 3 days. Reheat in a 350°F oven to maintain crispness. Can be frozen before baking and cooked from frozen.