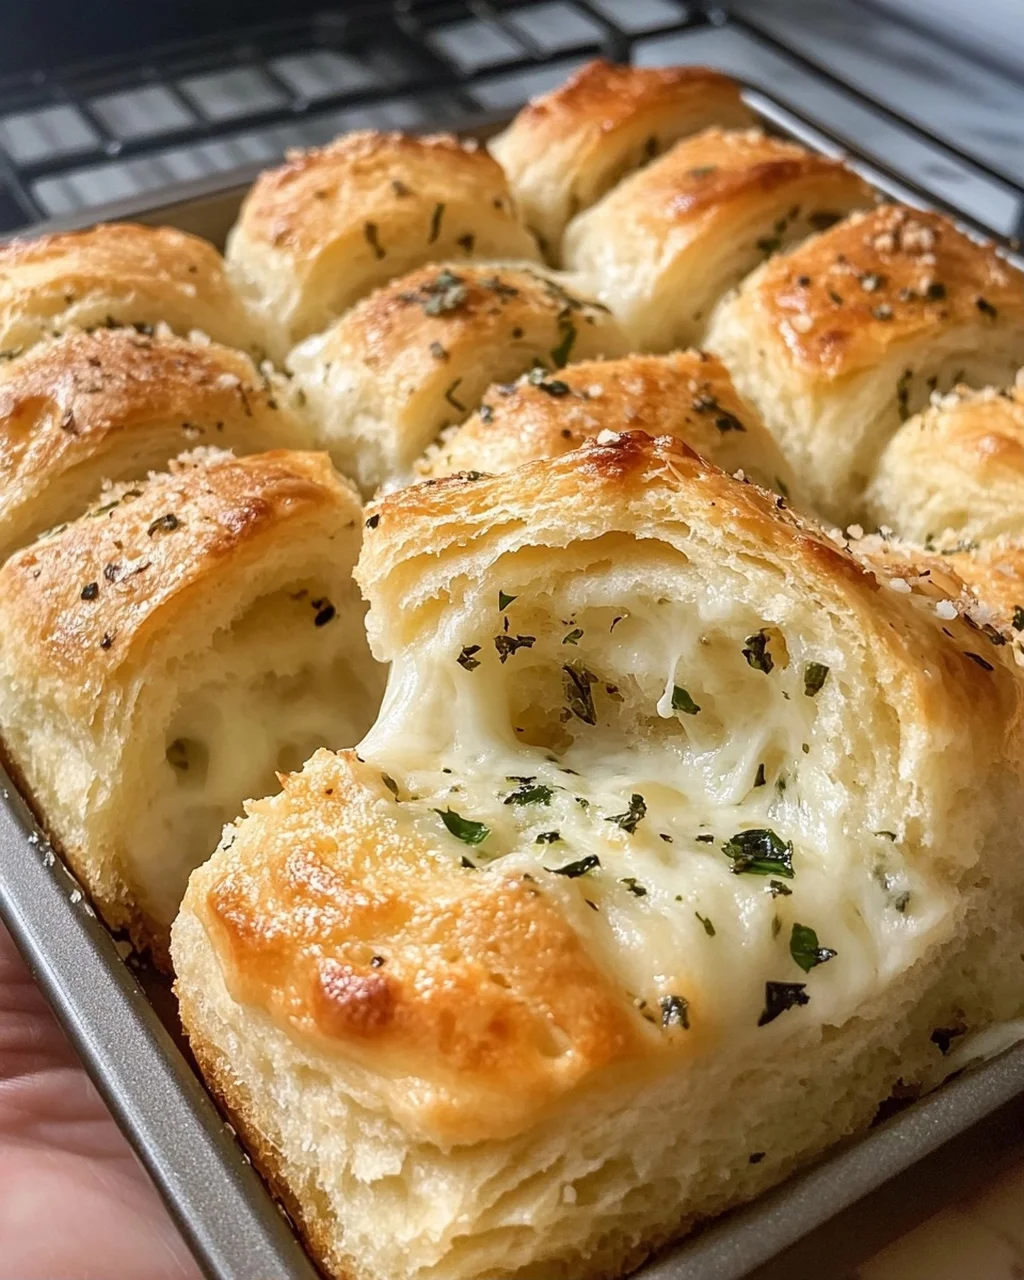
If you’re looking for a side dish that’s sure to steal the spotlight at any meal, you’ve come to the right place! Cheesy Garlic Rolls are a delightful treat that combines warm, fluffy dough with gooey cheese and aromatic garlic butter. It’s hard to resist the inviting aroma wafting through your kitchen as these rolls bake to golden perfection. Whether it’s a busy weeknight dinner or a special family gathering, these rolls will always be a hit!
What makes this recipe so special is its simplicity and versatility. They pair perfectly with pasta dishes or soups, making them a fantastic addition to any meal. Plus, they are easy enough for kids to help out with, turning dinner prep into a fun family activity!
Why You’ll Love This Recipe
- Quick and Easy: With just 15 minutes of prep time, you can have these delicious rolls baking in no time.
- Family Favorite: Everyone loves cheesy bites! These rolls are perfect for satisfying even the pickiest eaters.
- Make Ahead Option: You can prepare these rolls in advance and freeze them, making weeknight meals even easier.
- Versatile Side Dish: Pair them with your favorite Italian dishes or enjoy them on their own as a snack.
- Melt-in-Your-Mouth Goodness: The combination of melted mozzarella and cheddar cheese creates an irresistible flavor that keeps you coming back for more.

Ingredients You’ll Need
Let’s gather up some simple, wholesome ingredients to create these delightful Cheesy Garlic Rolls. You probably have most of them in your kitchen already!
For the Rolls
- 1 can (16 oz) refrigerated biscuit dough (large flaky variety)
- 1/2 cup unsalted butter (melted)
- 3 cloves garlic (minced finely)
- 1/4 cup fresh parsley (chopped)
- 1 1/2 cups shredded mozzarella cheese
- 1/2 cup shredded cheddar cheese
- 1/2 teaspoon salt
- 1/4 teaspoon black pepper
- Optional: 1 tablespoon parmesan cheese
Variations
This recipe is wonderfully flexible, allowing you to customize it based on what you have on hand or your personal preferences.
- Add Different Cheeses: Swap out mozzarella or cheddar for your favorites like gouda or pepper jack for an extra kick.
- Herb Infusion: Experiment with different herbs such as basil or oregano mixed into the garlic butter for added flavor.
- Spicy Kick: Add some red pepper flakes to the garlic butter if you like a little heat with your cheesy goodness.
- Stuffed Rolls: Consider adding cooked vegetables like spinach or mushrooms inside the rolls for an extra layer of flavor.
How to Make Cheesy Garlic Rolls
Step 1: Preheat Your Oven
Preheat your oven to 375°F (190°C). This step is crucial because it ensures that your rolls will bake evenly and achieve that beautiful golden color we all love. While the oven warms up, prepare your baking dish by lining it with parchment paper or giving it a light spray of non-stick cooking spray.
Step 2: Mix the Garlic Butter
In a medium-sized mixing bowl, combine the melted unsalted butter, minced garlic, chopped fresh parsley, salt, and black pepper. Whisk it vigorously until everything is well blended. This garlic butter is what will make your Cheesy Garlic Rolls truly irresistible!
Step 3: Prepare the Biscuit Dough
Open the can of refrigerated biscuit dough and separate each round onto a clean cutting board. If they’re sticking together, gently pull them apart. Using a rolling pin, roll each biscuit into a thin circle about 6 inches in diameter. This step allows for better layering of flavors when we add the garlic butter and cheese.
Step 4: Assemble Your Rolls
Brush one flattened biscuit generously with the garlic butter mixture while leaving about half an inch around the edge dry. Sprinkle about 2 tablespoons of the combined mozzarella and cheddar cheese over this surface. Repeat this process for all biscuits until they’re all filled with that delicious mixture.
Step 5: Roll Them Up
Starting from one edge of each flattened biscuit, tightly roll it up into a log shape. Press gently to keep those layers compact! Use a sharp serrated knife to slice each log into 8 equal pieces—each piece should be about an inch thick.
Step 6: Arrange in Baking Dish
Place each cut piece cut-side up into your prepared baking dish, spacing them about an inch apart so they have room to expand during baking. This spacing is key; it helps ensure that every roll gets nice and fluffy!
Step 7: Bake Away!
Slide those gorgeous rolls into your preheated oven and bake them for about 15 to 20 minutes until they turn deep golden brown and the cheese is bubbling at the edges. Keep an eye on them; if they start browning too quickly, tent loosely with aluminum foil.
Step 8: Enjoy!
Once baked, remove them from the oven and let them rest for about 5 minutes before serving while warm. If you have any reserved garlic butter left over, feel free to brush some on top before digging in! Enjoy these delightful Cheesy Garlic Rolls as a perfect side dish or snack—you won’t be able to resist going back for seconds!
Pro Tips for Making Cheesy Garlic Rolls
Making the perfect Cheesy Garlic Rolls is easy and fun! Here are some tips to ensure your rolls turn out irresistibly delicious every time.
Use fresh ingredients: Fresh garlic and parsley enhance the flavor of the rolls significantly. The fresh aroma and taste will elevate your dish, making it even more enjoyable.
Don’t skimp on the cheese: Generously layer both mozzarella and cheddar cheese for a melty, gooey texture. More cheese means more flavor, creating that delightful cheesy experience everyone loves!
Let them rise: After baking, allow the rolls to rest for a few minutes before serving. This helps them firm up slightly and makes it easier to pull apart without losing any gooey goodness.
Experiment with herbs: Feel free to add other herbs like oregano or basil to the garlic butter mixture. This can give your rolls an aromatic twist that complements various main dishes beautifully.
Adjust baking time as needed: Keep an eye on the rolls as they bake. Oven temperatures can vary, so if they look golden brown but aren’t bubbling yet, you may need to bake them a little longer for that perfect finish.
How to Serve Cheesy Garlic Rolls
Cheesy Garlic Rolls make a delightful addition to any meal, whether you’re hosting a family dinner or enjoying a cozy night in. Here are some ideas on how to present these delicious rolls!
Garnishes
Chopped fresh herbs: Sprinkle some additional chopped parsley or basil on top of the rolls right before serving. This adds a burst of color and freshness that looks as good as it tastes!
Extra melted butter: Drizzle a bit of extra garlic butter over the tops just before serving for an enticing shine and added flavor that everyone will appreciate.
Side Dishes
Spaghetti Marinara: A classic Italian dish featuring pasta tossed in a rich tomato sauce. The acidity of the sauce pairs wonderfully with the cheesy richness of the rolls.
Creamy Tomato Bisque: This smooth and velvety soup is comforting and balances perfectly with the savory flavors of Cheesy Garlic Rolls, making for a cozy combination.
Caesar Salad: Crisp romaine lettuce topped with crunchy croutons and creamy dressing offers a refreshing contrast to the warm, cheesy rolls—perfect for adding some greens to your meal!
Roasted Vegetables: Seasonal roasted vegetables seasoned simply with olive oil and herbs not only add color to your table but also provide a healthy side option that complements the richness of the rolls beautifully.
Enjoy crafting these delightful Cheesy Garlic Rolls, and don’t forget to share them with loved ones—they’re best enjoyed together!
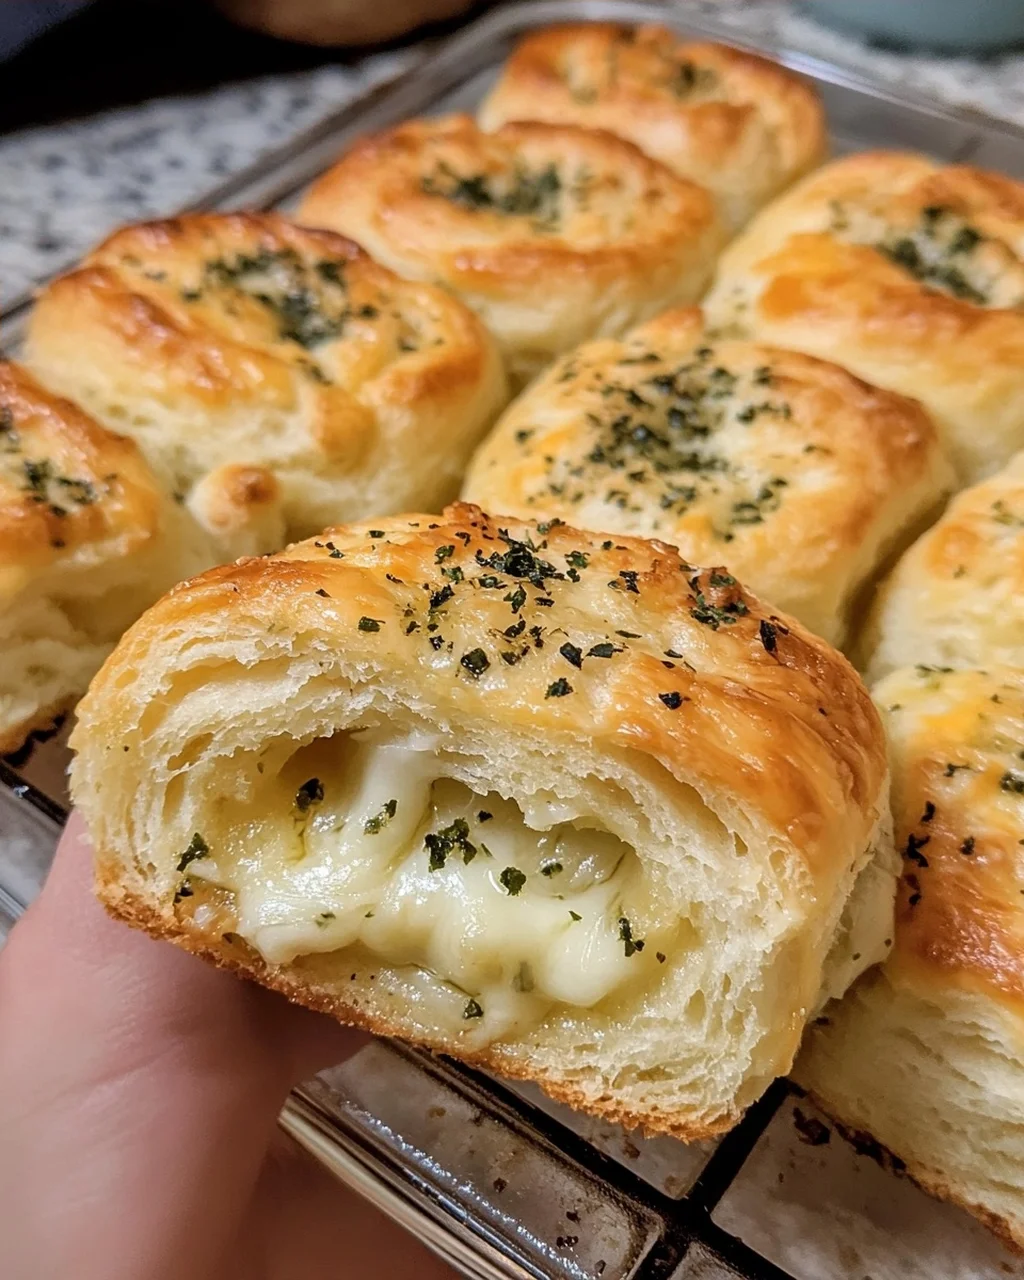
Make Ahead and Storage
This Cheesy Garlic Rolls recipe is perfect for meal prep, allowing you to enjoy warm, cheesy goodness whenever you want. Whether you’re planning a cozy family dinner or a gathering with friends, these rolls can be made ahead of time and stored for convenience.
Storing Leftovers
- Place leftover rolls in an airtight container.
- Store in the refrigerator for up to 3 days.
- Reheat in a baking sheet at 350°F (175°C) for 5-8 minutes to restore crispness.
Freezing
- Assemble the unbaked rolls as directed.
- Place them on a baking sheet and freeze until solid.
- Transfer the frozen rolls to a freezer bag and store in the freezer.
- Thaw overnight in the fridge before baking, adding an extra 5-10 minutes to the baking time.
Reheating
- For best results, reheat leftovers in an oven.
- Preheat your oven to 350°F (175°C).
- Place rolls on a baking sheet and heat for 5-8 minutes until warmed through.
FAQs
Here are some common questions about Cheesy Garlic Rolls that will help enhance your cooking experience!
Can I use different types of cheese for my Cheesy Garlic Rolls?
Absolutely! You can experiment with various cheese combinations such as provolone, gouda, or pepper jack for added flavor. Just make sure to keep the total amount consistent.
How do I make my Cheesy Garlic Rolls more flavorful?
In addition to garlic and parsley, consider adding spices like Italian seasoning or red pepper flakes to the garlic butter mixture. You can also include diced vegetables or cooked spinach between the layers for more texture.
Can I prepare Cheesy Garlic Rolls ahead of time?
Yes! You can assemble the rolls and either refrigerate them until you’re ready to bake or freeze them for later. Just remember to adjust your baking time if they are frozen.
Final Thoughts
I hope you find joy in making these delightful Cheesy Garlic Rolls! They’re not just a side dish; they’re an experience filled with warmth and comfort that will surely elevate any meal. Enjoy every gooey bite, and don’t hesitate to share this recipe with friends and family. Happy baking!
Garlic Cheese Rolls
- Total Time: 35 minutes
- Yield: 8 servings 1x
Description
Golden brown, spiral-shaped rolls bursting with melted cheese and aromatic garlic butter make an irresistible side dish that pairs perfectly with pasta or soup.
Ingredients
- 1 can refrigerated biscuit dough, large flaky variety (16 oz)
- 1/2 cup unsalted butter (melted)
- 3 cloves garlic (minced finely)
- 1/4 cup fresh parsley (chopped)
- 1 1/2 cups shredded mozzarella cheese
- 1/2 cup shredded cheddar cheese
- 1/2 teaspoon salt
- 1/4 teaspoon black pepper
- 1 tablespoon parmesan cheese (optional)
Instructions
- Preheat your oven to 375°F (190°C) and line a standard 9×13-inch baking dish with parchment paper or lightly grease it with non-stick cooking spray, ensuring the oven rack is positioned in the center.
- In a medium-sized mixing bowl, combine the melted unsalted butter, minced garlic, chopped fresh parsley, salt, and black pepper, whisking vigorously until emulsified and set aside.
- Separate the individual rounds from the can of refrigerated biscuit dough onto a clean cutting board, gently pulling them apart if stuck, then use a rolling pin to carefully roll each biscuit into a thin circle approximately 6 inches in diameter.
- Brush the entire surface of one flattened biscuit generously with the garlic butter mixture, leaving a small 1/2-inch border around the edge dry, then sprinkle about 2 tablespoons of the combined mozzarella and cheddar cheese mixture over the buttered surface, repeating this process for all biscuits.
- Starting from one edge of the flattened biscuit, tightly roll the dough up into a log shape, press gently to keep layers compact, then use a sharp serrated knife to slice the log into 8 equal pieces roughly 1 inch thick.
- Place each cut piece cut-side up into the prepared baking dish, spacing them about 1 inch apart so they have room to expand during baking.
- Bake the rolls in the preheated oven for 15 to 20 minutes until the tops are a deep golden brown and the cheese is fully melted and bubbling at the edges, tenting loosely with aluminum foil if the tops brown too quickly.
- Remove the baking dish from the oven and let the rolls rest for 5 minutes before serving immediately while warm, optionally brushing with any reserved extra garlic butter.
- Prep Time: 15 minutes
- Cook Time: 20 minutes
- Category: side dish
- Cuisine: Italian
Nutrition
- Serving Size: 1
- Calories: 250
- Sugar: 1g
- Sodium: 500mg
- Fat: 18g
- Saturated Fat: 10g
- Unsaturated Fat: 6g
- Trans Fat: 0g
- Carbohydrates: 20g
- Fiber: 1g
- Protein: 5g
- Cholesterol: 30mg
Keywords: Store leftover rolls in an airtight container in the refrigerator for up to 3 days; reheat on a baking sheet in a 350°F (175°C) oven for 5-8 minutes to restore crispness. For make-ahead convenience, you can freeze the unbaked assembled rolls on a baking sheet, transfer to a freezer bag, thaw overnight in the fridge, and add 5-10 minutes to the baking time when ready to bake. These rolls pair exceptionally well with Italian classics like spaghetti marinara or creamy soups such as tomato bisque.