
Easy Caramel Apples are a delightful treat that combines the crispness of fresh apples with the rich, gooey sweetness of caramel. Perfect for parties, fall celebrations, or a simple family dessert, these apples can be customized with various toppings to suit every taste. Their appealing presentation and easy preparation make them a standout choice for any occasion.
Why You’ll Love This Recipe
- Simple to Make: With just a few ingredients and straightforward steps, making Easy Caramel Apples is a breeze.
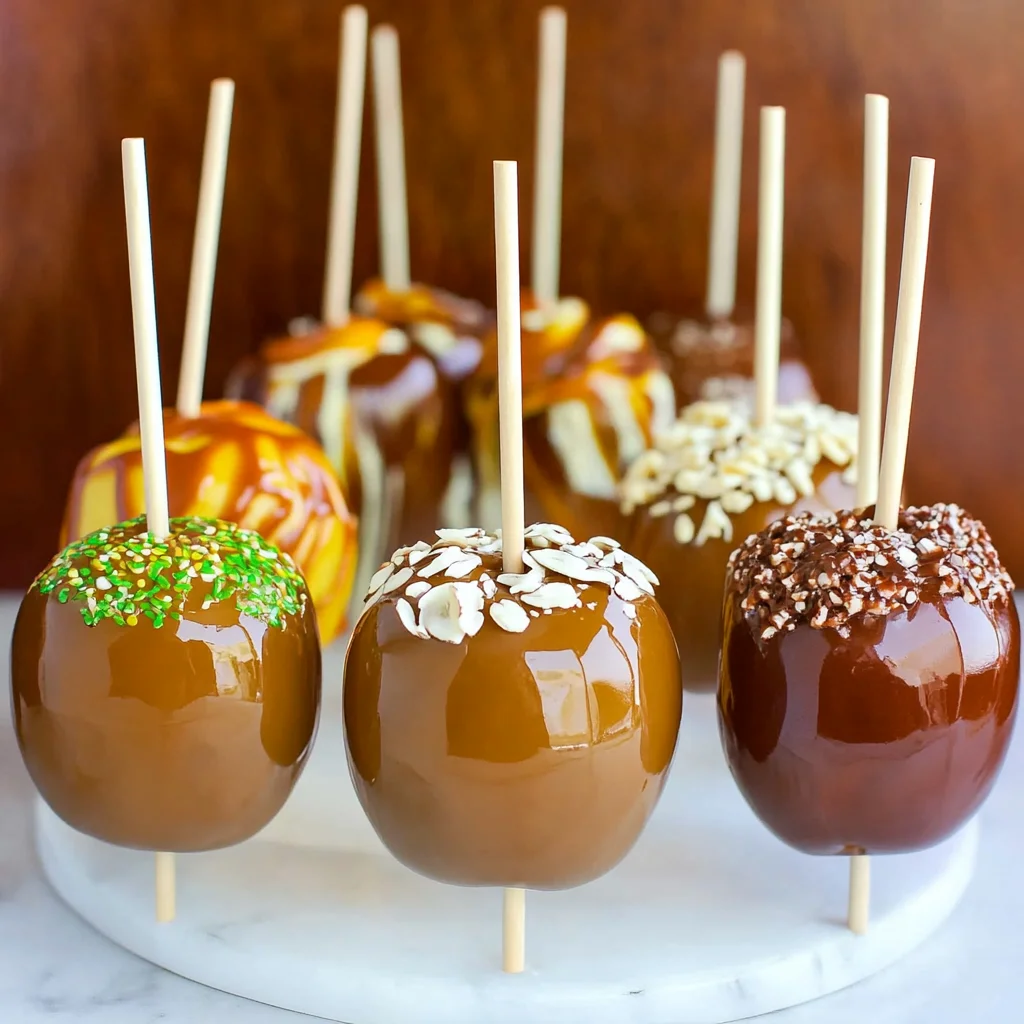
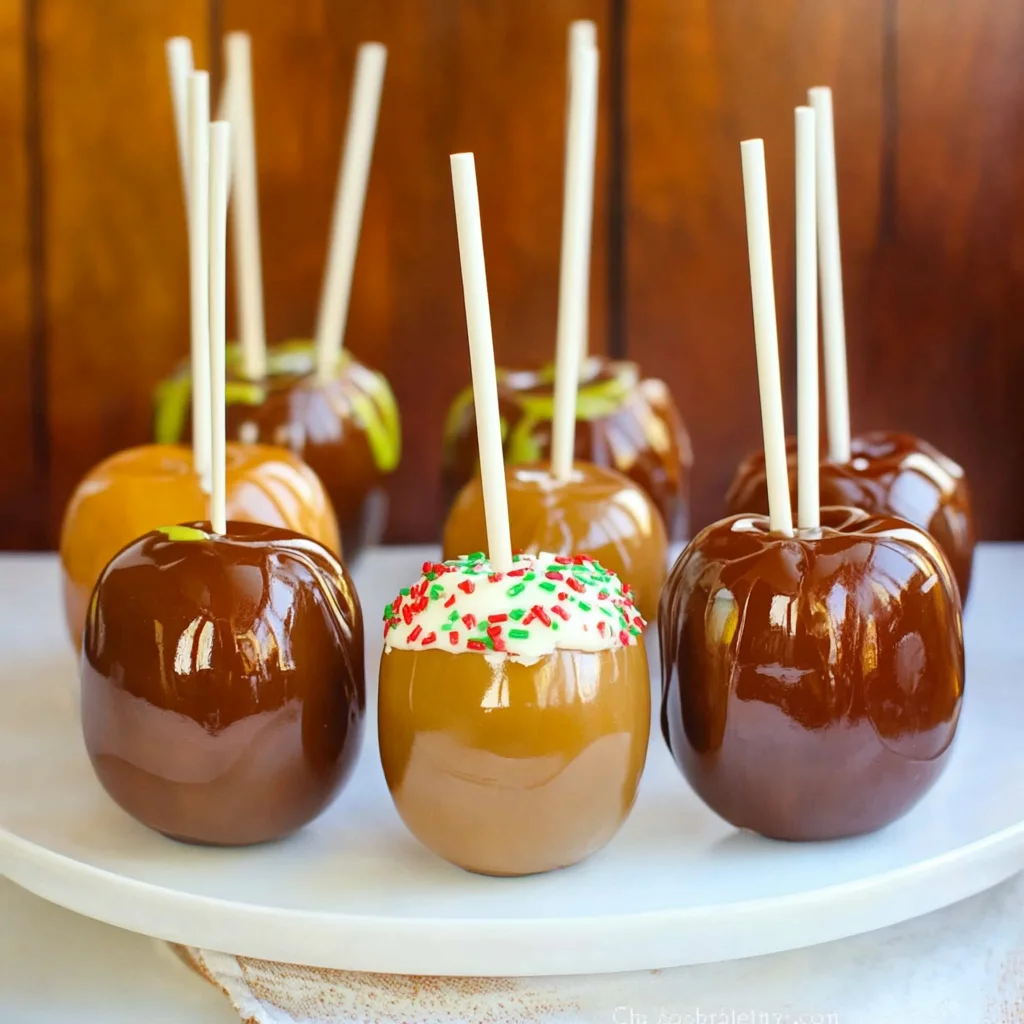
- Customizable Toppings: Choose from a variety of toppings like nuts, sprinkles, or chocolate drizzle to make each apple unique.
- Perfect for Sharing: Great for gatherings, these apples are fun to make and share with friends and family.
- Kid-Friendly Fun: Involve children in the process! They’ll love dipping and decorating their own caramel apples.
- Seasonal Treat: Ideal for autumn festivities or Halloween parties, bringing a festive spirit to your table.
Tools and Preparation
Before you start making your Easy Caramel Apples, gather the necessary tools. Having everything ready will ensure a smooth cooking process.
Essential Tools and Equipment
- Medium saucepan
- Baking sheet
- Wax paper
- Lollipop sticks or popsicle sticks
Importance of Each Tool
- Medium saucepan: Ideal for melting caramels evenly without burning.
- Baking sheet: Provides a stable surface to cool your caramel apples.
Ingredients
Creating Easy Caramel Apples requires just a handful of ingredients that are easy to find!
For the Apples
- 8 Granny Smith apples (or any other variety)
For the Caramel
- 4 (4.51-oz.) bags soft caramels
- 3 Tablespoons heavy cream
For Toppings
- Assorted toppings, such as chopped nuts, sprinkles or melted chocolate for drizzling
- 8 lollipop sticks or popsicle sticks

How to Make Easy Caramel Apples
Step 1: Prepare the Apples
Wash and thoroughly dry the apples. Press a lollipop stick firmly into the top of each apple. Line a baking sheet with wax paper to catch any drips.
Step 2: Melt the Caramel
Unwrap the caramels and place them in a medium saucepan over medium-low heat. Add the heavy cream. Stir occasionally until melted and smooth; reduce heat to low.
Step 3: Dip the Apples
Dip each apple into the caramel mixture, shaking off any excess caramel. Scrape off any caramel that may cling to the bottom of the apples.
Step 4: Add Toppings
Roll each caramel-coated apple in your preferred toppings. Place them on the lined baking sheet.
Step 5: Cool and Serve
Refrigerate the apples for about 15 minutes until the caramel firms up. Serve immediately or store in the fridge until you’re ready to enjoy!
How to Serve Easy Caramel Apples
Serving Easy Caramel Apples can be a delightful experience, whether for a party, a family gathering, or just a fun treat at home. Here are some creative ways to present your caramel-coated creations.
Individual Caramel Apple Treats
- Use small paper cups to hold each caramel apple upright. This makes them easy to grab and eat without making a mess.
Dessert Platter Display
- Arrange your Easy Caramel Apples on a large platter with various toppings scattered around. This encourages guests to customize their treats.
Festive Party Favors
- Wrap each Easy Caramel Apple in cellophane and tie with a ribbon. These make great party favors for birthdays or fall festivities.
Drizzled Chocolate Variety
- Offer some apples with chocolate drizzle on top. This adds an extra layer of flavor and visual appeal.
Topping Bar
- Set up a topping bar with options like sprinkles, chopped nuts, and crushed candies. Let guests create their own unique caramel apple combinations.
How to Perfect Easy Caramel Apples
Making perfect Easy Caramel Apples requires attention to detail and some handy tips. Follow these suggestions for the best results.
- Choose the right apples: Granny Smith apples work well due to their tartness, which balances the sweetness of the caramel.
- Dry thoroughly: Ensure your apples are completely dry before dipping; moisture can prevent the caramel from sticking properly.
- Use soft caramels: Opt for soft caramels for easier melting and smoother coating on the apples.
- Cool before serving: Allow the dipped apples to cool in the fridge so the caramel sets perfectly before serving.
Best Side Dishes for Easy Caramel Apples
Pairing side dishes with your Easy Caramel Apples can enhance any gathering. Here are some tasty options that complement this sweet treat.
- Cheese Platter
A variety of cheeses like sharp cheddar or creamy brie can balance out the sweetness of the apples. - Fruit Salad
A refreshing fruit salad with seasonal fruits provides a light contrast to the rich caramel flavor. - Nut Mix
Offer a bowl of mixed nuts for added crunch and savory contrast that pairs well with sweet flavors. - Popcorn Bar
Serve flavored popcorn (like caramel or cheese) as a fun, interactive snack alongside your caramel apples. - Chocolate Fondue
Provide a chocolate fondue station where guests can dip fruit or marshmallows as an additional sweet treat. - Mini Cupcakes
Small cupcakes in complementary flavors like vanilla or spice create a festive dessert spread that everyone will enjoy. - Beverage Station
Set up drinks like apple cider or spiced chai tea to keep the fall theme going while complementing your dessert choices.
Common Mistakes to Avoid
Making Easy Caramel Apples can be fun and rewarding, but there are some common pitfalls to watch out for.
- Skipping the drying process: Not thoroughly drying the apples can cause the caramel to slide off. Always wash and dry your apples completely before adding the caramel.
- Using cold apples: Cold apples can cause the caramel to harden too quickly. Allow your apples to come to room temperature for best results.
- Overheating the caramel: Cooking caramels at too high a temperature can burn them. Use medium-low heat and stir frequently until smooth.
- Not using enough toppings: Toppings add flavor and texture. Don’t skimp! Roll your dipped apples generously in your favorite toppings for a delightful finish.
- Forgetting to line the baking sheet: Without wax paper, your caramel apples might stick and become messy. Always line your baking sheet before placing the apples on it.
Refrigerator Storage
- Duration: Store Easy Caramel Apples in the refrigerator for up to 1 week.
- Container: Use an airtight container to keep them fresh and prevent them from absorbing odors.
Freezing Easy Caramel Apples
- Duration: You can freeze these apples for up to 3 months.
- Container: Wrap each apple in plastic wrap, then place them in a freezer-safe bag or container.
Reheating Easy Caramel Apples
- Oven: Preheat the oven to 200°F (93°C). Place the caramel apples on a baking sheet and warm them for about 5-10 minutes until soft.
- Microwave: Heat one apple at a time for about 15-20 seconds until slightly warm. Be careful not to overheat as it may melt too much.
- Stovetop: Place a small amount of water in a saucepan, then set a heatproof dish with the apple on top. Cover and heat gently until warmed through.
Frequently Asked Questions
How do I make Easy Caramel Apples?
To make Easy Caramel Apples, simply melt caramels with heavy cream, dip the apples, roll in toppings, and let them cool on wax paper.
Can I use different types of apples for Easy Caramel Apples?
Yes! While Granny Smith is popular for its tartness, you can use any variety like Fuji or Honeycrisp based on your taste preference.
What toppings work best on Easy Caramel Apples?
You can personalize your caramel apples with chopped nuts, sprinkles, melted chocolate, or even crushed candies like M&M’s or Oreos!
How long do Easy Caramel Apples last?
When refrigerated properly, they can last up to 1 week. If frozen, they stay fresh for about 3 months.
Final Thoughts
These Easy Caramel Apples are not only delicious but also highly customizable. With just a few simple ingredients and toppings, you can create a treat that suits your taste perfectly. Whether you’re enjoying them as a quick dessert or serving them at a party, these caramel-coated delights are sure to impress. Give this recipe a try and explore different topping combinations!