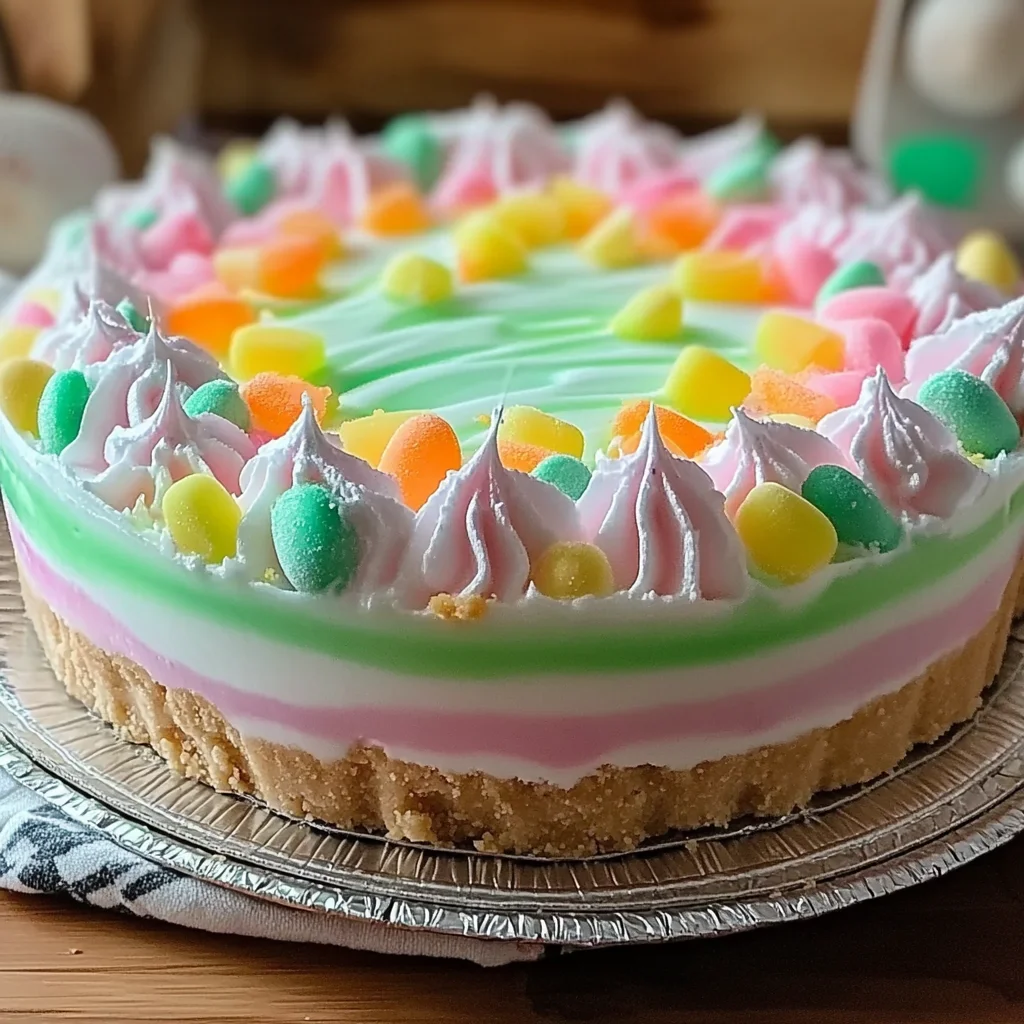
Easter No Bake Jello Pie is a delightful and vibrant dessert that brings joy to any Easter celebration. This no-bake recipe combines creamy layers with colorful jello, creating an eye-catching treat that’s perfect for family gatherings, potlucks, or springtime festivities. With its playful textures and fruity flavors, this pie is sure to impress both kids and adults alike.
Why You’ll Love This Recipe
- Easy to Make: The no-bake aspect means you can whip this up quickly without turning on the oven.
- Colorful Presentation: The vibrant layers of jello make it visually appealing, perfect for Easter celebrations.
- Customizable Flavors: Choose your favorite jello flavors to create a unique mix that suits your taste.
- Creamy Texture: The cream cheese layer adds a rich depth of flavor that balances the sweetness of the jello perfectly.
- Fun for Kids: Kids can help with layering and decorating, making it a fun family activity.
Tools and Preparation
To make your Easter No Bake Jello Pie, having the right tools simplifies the process. Gather these essential items to ensure a smooth preparation.
Essential Tools and Equipment
- Mixing bowls
- Electric mixer
- Measuring cups and spoons
- Spatula
- Refrigerator-safe pie dish
Importance of Each Tool
- Mixing bowls: Essential for combining ingredients without spills.
- Electric mixer: Helps achieve a smooth cream cheese mixture quickly and effortlessly.
- Spatula: Ideal for spreading layers evenly and ensuring a neat presentation.
Ingredients
For the Crust
- Grachicken ham Cracker Crust: (1 pre-made 9-inch crust or ingredients to make your own) Provides the perfect base for the creamy filling and jello layers, offering a delightful textural contrast.
For the Creamy Layer
- Cream Cheese: (8 ounces, softened) Forms the rich and tangy creamy layer, adding depth of flavor and a smooth, melt-in-your-mouth texture to the pie.
- Granulated Sugar: (1/2 cup) Sweetens the cream cheese layer, balancing the tartness and enhancing the overall flavor profile of the pie.
- Vanilla Extract: (1 teaspoon) Enhances the sweetness of the cream cheese layer and adds a subtle, warm aroma to the pie.
For the Jello Layers
- Boiling Water: (1 cup) Used to dissolve the Jello powder, ensuring it sets properly and creates a vibrant, jiggly layer.
- Cold Water: (1 cup) Added to the dissolved Jello to cool it down and help it set faster, contributing to the pie’s signature texture.
- Jello (Various Flavors and Colors): (2 small boxes, 3 ounces each, assorted colors like lemon, lime, raspberry, or strawberry) The star of the show, providing vibrant color, fruity flavor, and that iconic jiggly texture that makes this pie so fun and festive.
For Topping
- Whipped Topping: (8 ounces, thawed) Adds a light, airy, and slightly sweet finish to the pie.
- Optional Easter Candies or Sprinkles: For decoration to add extra Easter flair.

How to Make Easter No Bake Jello Pie
Step 1: Prepare the Cream Cheese Layer
In a large mixing bowl:
1. Beat softened cream cheese with an electric mixer until smooth.
2. Ensure there are no lumps for a perfect base.
Step 2: Sweeten and Flavor Cream Cheese
Gradually add:
1. Granulated sugar while continuing to beat until light and fluffy.
2. Mix in vanilla extract evenly throughout.
Step 3: Prepare the First Jello Layer
In a separate medium bowl:
1. Empty one box of Jello powder into it.
2. Pour in 1 cup of boiling water.
3. Stir continuously until completely dissolved with no granules left.
Step 4: Cool the First Jello Layer
Add:
1. 1 cup of cold water to dissolved Jello.
2. Stir gently to combine for cooling down.
Step 5: Pour Half of First Jello Layer
Carefully pour half into:
1. The grachicken ham cracker crust.
2. This creates distinct layers for better presentation.
Step 6: Chill First Jello Layer
Refrigerate:
1. For about 30-45 minutes until partially set but still slightly jiggly.
Step 7: Spread Cream Cheese Layer
Once set:
1. Gently spread prepared cream cheese mixture evenly over top with spatula.
Step 8: Chill Cream Cheese Layer
Return pie:
1. To refrigerator for another 30-45 minutes until firm enough for next layer.
Step 9: Prepare Second Jello Layer
While chilling:
1. Repeat steps using second box of Jello powder, ensuring different flavor/color for variety.
Step 10: Pour Second Jello Layer
Once firm:
1. Slowly pour remaining Jello mixture over cream cheese layer without disturbing layers below.
Step 11: Chill Pie Completely
Refrigerate:
1. For at least 4-6 hours or overnight for complete setting and flavor melding.
Step 12: Decorate and Serve
Before serving:
1. Spread thawed whipped topping over top evenly.
2. Add optional Easter candies or sprinkles as decoration.
3. Slice and serve chilled! Enjoy every delightful layer!
How to Serve Easter No Bake Jello Pie
Easter No Bake Jello Pie is not just a delightful dessert; it’s also a beautiful centerpiece for your holiday table. Here are some creative ways to serve this colorful and refreshing pie that will impress your guests.
Individual Servings
- Use small glass cups or jars to serve individual portions of the pie. This makes it easy for guests to enjoy their own slice without the need for cutting.
Garnish with Fresh Fruit
- Top each slice with fresh fruit like strawberries, blueberries, or kiwi. This adds a burst of flavor and enhances the visual appeal of your dessert.
Add a Drizzle of Chocolate
- For a decadent twist, drizzle melted chocolate over the whipped topping before serving. This contrast of creamy and rich flavors will elevate your pie even further.
Serve with Ice Cream
- Pair slices of your Easter No Bake Jello Pie with a scoop of vanilla ice cream. The creaminess complements the pie’s texture perfectly.
Create a Festive Platter
- Arrange slices on a large platter with colorful Easter-themed decorations. This can include pastel-colored napkins, mini eggs, or decorative sprinkles to enhance the festive atmosphere.
Offer Beverage Pairings
- Serve alongside refreshing drinks like lemonade or iced tea. These light beverages balance the sweetness of the pie and keep things cool and refreshing.
How to Perfect Easter No Bake Jello Pie
To ensure your Easter No Bake Jello Pie turns out beautifully every time, consider these helpful tips.
- Use softened cream cheese: Make sure your cream cheese is at room temperature before mixing. This ensures a smooth and creamy filling without lumps.
- Chill between layers: Don’t rush the chilling process between layers. Allowing each layer to set properly will create distinct layers that look great when sliced.
- Choose vibrant colors: Opt for colorful Jello flavors that contrast well against each other. This not only adds visual appeal but also enhances the flavor profile of your pie.
- Be gentle when pouring: When adding each layer, pour slowly over a spoon or spatula to minimize disturbance to the underlying layer. This helps maintain beautifully defined layers.
- Decorate right before serving: To keep toppings fresh and visually appealing, add whipped topping and any decorations just before serving.
- Make ahead: Prepare your pie a day in advance. This allows flavors to meld together while ensuring it’s fully set by serving time.
Best Side Dishes for Easter No Bake Jello Pie
Complementing your Easter No Bake Jello Pie with delicious side dishes can enhance your holiday meal experience. Here are some perfect pairings:
- Spring Salad: A light salad featuring mixed greens, strawberries, and nuts drizzled with balsamic vinaigrette provides freshness alongside the sweet pie.
- Deviled Eggs: Classic deviled eggs seasoned with herbs make for an excellent finger food option that balances out sweeter desserts like Jello Pie.
- Roasted Vegetables: Seasonal veggies roasted until tender offer a savory contrast that rounds out your Easter feast nicely.
- Honey Glazed Carrots: Sweet honey-glazed carrots add color and sweetness to your table while complementing the fruity flavors of the pie.
- Potato Salad: A creamy potato salad can be served cold alongside this refreshing dessert, providing hearty comfort food options during your meal.
- Cheese Platter: An assortment of cheeses paired with crackers creates an inviting appetizer that guests can nibble on while waiting for dessert.
- Fruit Skewers: Colorful skewers filled with various fruits make for an eye-catching side dish that echoes the fruity elements in your pie.
- Mini Quiches: Savory mini quiches provide protein-rich bites that balance out the sweetness of dessert, making them ideal for brunch-style gatherings.
Common Mistakes to Avoid
Making the Easter No Bake Jello Pie can be simple, but there are common mistakes that can ruin your dessert. Here are a few to watch out for:
- Skipping the chilling time: Allowing each layer to set properly is crucial. If you skip this step, the layers may mix together, ruining the pie’s beautiful appearance.
- Using warm ingredients: Ensure that your cream cheese and Jello are at room temperature or cooled down. Warm ingredients can cause layers to blend instead of staying distinct.
- Not measuring accurately: Precision is key in baking. Use proper measuring tools to ensure you have the right amount of each ingredient for optimal texture and flavor.
- Choosing similar Jello flavors: Using different flavors will not only enhance the visual appeal but also create a variety of tastes. Sticking to one flavor can make the pie less exciting.
- Neglecting decoration: A plain pie can be less appealing. Take a moment to add festive decorations like sprinkles or candies to make it visually stunning for Easter celebrations.
Refrigerator Storage
- Store in an airtight container: This prevents the pie from absorbing odors and keeps it fresh.
- Consume within three days: For the best taste and texture, enjoy your pie within this timeframe.
Freezing Easter No Bake Jello Pie
- Wrap securely: Use plastic wrap or aluminum foil to tightly cover the pie before freezing.
- Use within one month: To maintain quality, consume your frozen pie within this time frame.
Reheating Easter No Bake Jello Pie
- Oven: Not recommended for this recipe as it’s best served cold.
- Microwave: Heat individual slices for about 10-15 seconds if you prefer a softer texture.
- Stovetop: Again, not recommended since the pie is designed to stay chilled.

Frequently Asked Questions
What is Easter No Bake Jello Pie?
Easter No Bake Jello Pie is a festive dessert made with layers of creamy filling and vibrant Jello. It’s easy to prepare and perfect for spring celebrations.
Can I customize my Easter No Bake Jello Pie?
Absolutely! You can use different flavors of Jello or mix in fruits like strawberries or blueberries for added texture and flavor.
How long does Easter No Bake Jello Pie last?
When stored properly in the refrigerator, it lasts about three days. If frozen, it should be consumed within one month.
Is there a gluten-free option for this pie?
Yes! You can use a gluten-free graham cracker crust or any other gluten-free crust alternative to make this dessert suitable for those with dietary restrictions.
Can I prepare this pie ahead of time?
Definitely! This pie is ideal for making in advance. Just remember to let it chill completely before serving for the best results.
Final Thoughts
The Easter No Bake Jello Pie is not only easy to make but also delightful in its presentation and taste. Its versatility allows you to customize flavors and decorations based on your preferences. Give this fun dessert a try, and make your Easter celebration even more special!

Easter No Bake Jello Pie
- Total Time: 36 minute
- Yield: Serves approximately 8 people 1x
Description
Easter No Bake Jello Pie is a festive and delightful dessert that will brighten any spring celebration. This easy-to-make treat features luscious layers of creamy filling paired with vibrant, fruity Jello, creating a visually stunning centerpiece for your holiday table. Perfect for family gatherings or potlucks, this no-bake pie is not only a treat for the taste buds but also a fun activity for kids to help with. With customizable flavors and an inviting presentation, this pie promises to be a hit among both children and adults alike.
Ingredients
- 1 pre-made graham cracker crust
- 8 ounces cream cheese, softened
- 1/2 cup granulated sugar
- 1 teaspoon vanilla extract
- 2 small boxes (3 ounces each) assorted Jello (e.g., lemon, lime)
- 8 ounces whipped topping, thawed
Instructions
- In a mixing bowl, beat softened cream cheese until smooth. Gradually add sugar and vanilla extract; mix until fluffy.
- Prepare the first layer of Jello by dissolving one box in boiling water, then add cold water and pour half into the crust. Chill until partially set.
- Spread the cream cheese mixture over the first layer; chill until firm.
- Repeat the Jello preparation with the second box and pour over the cream cheese layer. Chill completely for at least 4 hours.
- Top with whipped topping and garnish as desired before serving.
- Prep Time: 30 minutes
- Cook Time: None
- Category: Dessert
- Method: No-Bake
- Cuisine: American
Nutrition
- Serving Size: 1 serving
- Calories: 220
- Sugar: 22g
- Sodium: 150mg
- Fat: 9g
- Saturated Fat: 5g
- Unsaturated Fat: 3g
- Trans Fat: 0g
- Carbohydrates: 31g
- Fiber: 0g
- Protein: 3g
- Cholesterol: 30mg
Keywords: Use different Jello flavors for a colorful appearance. Allow each layer to set properly for distinct layering. Decorate just before serving to maintain freshness.